Raspberry Pi startup

The first thing I did when I bought my first Raspberry was to install and run an OpenElec Media Center image: works, faster and easier than expected. Thanks to the HDMI connector and the full-HD graphics chip, the Raspberry Pi works wonderfully as a TV supplement when smart TV functions are missing or lacking, or as an engine for a retro game console like Super Nintendo. There are also more specialized images for automation tasks, for example as a supplement for controlling a 3D printer, or for use as a smart home control center.
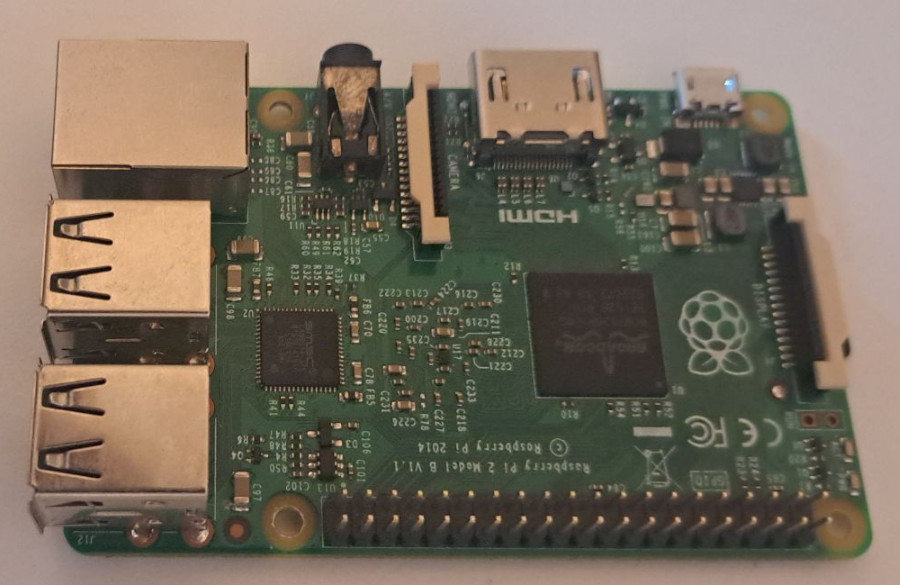
The images for the Raspberry Pi are usually pre-configured and basically only need to be installed on a micro SD card, which the Raspberry then boots from. Admittedly, when it comes to automation or special requirements up to the development of your own applications, it is not just a matter of installing an image ...
Does a Raspberry Pi pay off?
In 2017, I would have answered this question with "yes", back then a current model cost around 40$. 6 years later, the now aging hardware costs over 100€ in the meantime and the current models even more. Whether a Raspberry Pi pays off, still depends on the purpose. The fact is that the price-performance ratio of the Raspberry Pi was certainly better some years ago.
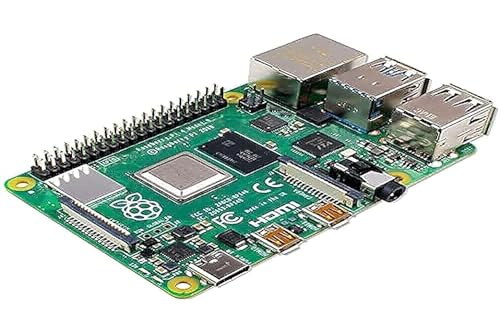
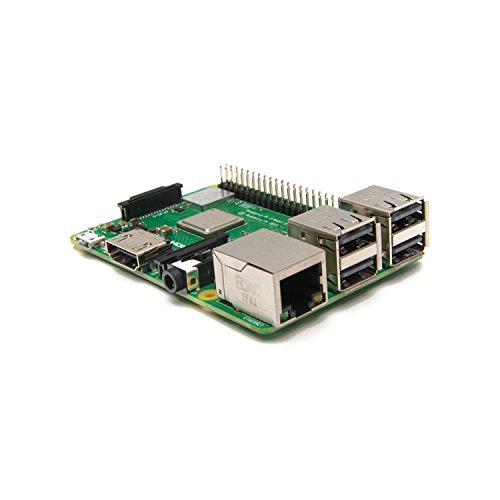
For what purpose is the Raspberry Pi best suited?
The Raspberry Pi is ideal for creating images for a specific purpose, such as a SmartHome control center, as a controller for the 3D printer or to be used as a media center. If you want to run multiple web services on one device, you could alternatively use a hardware with x68-64 architecture and optionally Docker.
Quickstart summary
As a shortcut for all impatient people, I have summarized the essential steps for the startup in advance:
- Selection of an image
- Loading the image onto a micro SD card
- Plugging in the power supply and switching on ...
Requirements
- Raspberry-Pi: of course ...
- Optional: case
- Micro USB power supply or smartphone charging cable for power supply, e.g. USB cell phone charger best with at least 2A.
- Optional for network connection:
- Ethernet cable or WLAN access
- For the control (input devices)
- Via network (Ethernet or WLAN) or
- USB keyboard, mouse, remote control or
- Bluetooth input device or
- when using a TV set with CEC and a suitable HDMI cable, the control can be done via the TV remote control.
- Optional: depending on requirements HDMI screen
Images
The first step is to select a suitable operating system. Depending on the field of application, an already preconfigured image can be used, as already mentioned. The easiest way to install one of the known images is via the Raspberry Pi Imager: https://www.raspberrypi.com/software/. In addition to its own image files, the small tool can also independently download known images and record them on the SD card.

It is important to select the drive letter for the SD card, otherwise a wrong partition could be overwritten ...
Here are the most popular images downloaded via the Raspberry Pi Imager in the last month:
| Operating System | Percentage |
|---|---|
| Raspberry Pi OS (other) | 35.10% |
| Raspberry Pi OS (32-bit) | 25.52% |
| Ubuntu | 10.43% |
| Home Assistant | 6.46% |
| OctoPi | 3.73% |
| Bootloader | 3.54% |
| RetroPie | 3.09% |
| Recalbox | 2.24% |
| Mainsail OS | 1.69% |
| LibreELEC | 1.28% |
| Kali Linux | 1.21% |
Raspberry Pi OS (formerly Raspbian)
Raspberry Pi OS is a Linux image based on Debian. Raspbian is the recommended OS for the Raspberry and is used by many other images as a base. For Raspberry Pi OS you don't have to plug a screen to the HDMI output in the first step. So that SSH is automatically active at the first start, a file named "ssh" can be created on the SD card. Since the network card is set to DHCP by default, the Raspberry can get an IP when connecting via network cable to a router, with this we can then connect to the Raspberry via SSH.
Download the current version at: https://www.raspberrypi.com/software/
For SSH access via Putty or directly from Linux, the assigned IP address of the router and the following credentials are used for the connection: As SSH user "pi" and as password: "raspberry" is used.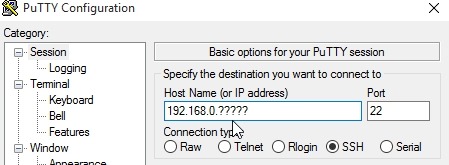
(Connection via Putty: the IP can be read out in the user administration of the router used).
The initial configuration can be started with the command: sudo raspi-config.
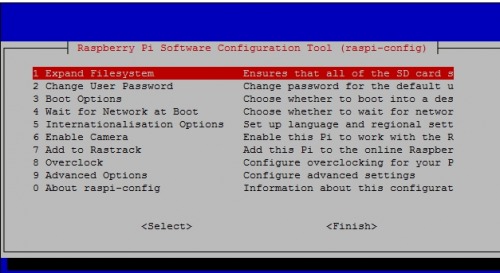
As with other Debian-based Linux OSes, new software updates can be applied to the PI by means of
sudo apt-get update
sudo apt-get upgrade
Can be used to install new software updates.
Firmware Update
using: sudo rpi-update
Home Assistant
The Raspberry Pi can be used as a server for Home Assistant from version 3.
OpenElec
To use a media center, we plug the Raspberry into a monitor or TV via HDMI. New TVs can then control the Raspberry via the HDMI cable and the TV remote. Version 3 of the Raspberry can also integrate into the home network via WLAN and pair Bluetooth devices in addition to USB remote controls. A simple USB mouse is also sufficient for the initial setup.
Download: http://openelec.tv/get-openelec
RetroPie
Retro game console. Ready-to-use image with numerous emulators for mostly older game consoles such as Super Nintendo.
Download: https://retropie.org.uk/
OctoPi
Control for 3D printer, see: OctoPi - installation
Change IP or WLAN SID:
sudo nano /boot/octopi-network.txtInstalling an image under Linux e.g. Ubuntu
Display the drives with the command: lsblk or display with df -h
user@rechner ~ $ df -h
Filesystem      Size  Used Avail Use% Mounted on
udev 7,9G 4,0K 7,9G 1% /dev
tmpfs 1,6G 1,7M 1,6G 1% /run
/dev/sdb1 44G 27G 15G 64% /
none 4,0K 0 4,0K 0% /sys/fs/cgroup
none 5,0M 0 5,0M 0% /run/lock
none 7,9G 88M 7,8G 2% /run/shm
none 100M 36K 100M 1% /run/user
/dev/sde2 7,2G 2,5G 4,5G 36% /media/boern/retropie
/dev/sde1 57M 20M 37M 36% /media/boern/boot
Clone image to the SD card:
sudo umount /dev/sde1sudo umount /dev/sde2sudo dd bs=4M if=/media/temp/pi3_retro_snes.img of=/dev/sdecreate compressed image:
sudo dd bs=4M if=/dev/sde | gzip > /media/temp/image`date +%d%m%y`.gzRestore compressed images:
sudo gzip -dc /media/temp/image???.gz | dd bs=4M of=/dev/sde

Raspberry PI as WLAN access point
As an extension for my home network, I tested the Raspberry Pi 3 as a WLAN access point. Due to the integrated WLAN chip, the minicomputer can easily be used as an additional WLAN access point on an Ethernet cable. ... continue reading

OctoPi Installation - 3D-Printer Webinterface
A Raspberry Pi with OctoPi installed offers a very easy way to upgrade existing 3D printers. ... continue reading
 ({{pro_count}})
{{percentage}} % positive
 ({{con_count}})
Questions / Comments