DuckDNS: Home Assistant - free of charge remote access
There are various options for configuring Home Assistant in your own network for Internet access. Alternatives to the Home Assistant Cloud: 7.5$ / month or a VPN service, a free DNS entry and port forwarding are available. Who as installation variant HAOS you can use can use DuckDNS. For all those who want to use Home Assistant Core in a Docker container I recommend Traefik as a reverse proxy. Apart from the Home Assistant Cloud, DuckDNS is probably the simplest and most cost-effective way to allow direct remote access.
Remote access to Home Assistant: options and recommendations
- Home Assistant Cloud: €7.5 / month
- VPN access
- HAOS installation
- DynDNS provider (e.g. DuckDNS) and port forwarding (free of charge; this article; = recommended variant)
- CloudFlare tunnel: Requires a paid domain (approx. €7-€20 per year)
- Home Assistant Core
- Docker and Reverse proxy with port forwarding (recommended for operating Home Assistant Core as a pure Docker container)
- Docker and CloudFlare tunnel and reverse proxy
Read out Home Assistant IP address
First of all, we need the IP address of Home Assistant, e.g. this can be read out very easily under Settings / System / Network and IPv4:
In the next step, we need the IP address as the destination for port forwarding. In a home network, the gateway address usually refers to the Internet router, so we can use the address to call up its administration interface:
Setting up port forwarding on the router (here OpenWrt)
Entered in the browser, the management interface of the router is displayed: here 192.168.1.2. At this point, the management interface differs depending on the router type and firmware version. The aim is to forward the external port: 8123 to the internal IP address of Home Assistant:
| Source | Destination |
|---|---|
| WAN (Internet), port 8123 | Home Assistant IP address (in the example: 192.168.1.149), port 8123 |
In OpenWrt, the menu for port forwarding is located under Network / Firewall and Port Forwards:
See also: Making available from the Internet: Port forwarding - OpenWRT
Even if access via the IP address is already working, please don't stop now: We still need to encrypt the connection and for this we next need a DNS entry ...
Create DuckDNS domain
In order for the connection to take place securely via https and a certificate, we need a DNS name on the Internet and an associated certificate. A free DNS entry at DuckDNS can be used as the DNS name:
Since a Github account is also required for the Home Assistant Community Store (HACS), it makes sense to also use this account to log in to Duck DNS.
Activate DuckDNS Add-on
The DuckDNS add-on takes care of synchronizing the public IP address with the DNS entry and issuing a free Let's Encrypt certificate:
Configuring the Duck DNS add-on
For the Duck DNS configuration, it is sufficient to enter the domain name and the token:
YAML configuration:
domains:
  - ha4libenetdemo.duckdns.org
token: d0cefdc5-1c41-4cf5-a019-8e2a0b3a2cab
aliases: []
lets_encrypt:
  accept_terms: true
  algo: secp384r1
  certfile: fullchain.pem
  keyfile: privkey.pem
seconds: 300
Home Assistant could now already be reached from the Internet with the Duck DNS domain "http://???.duckdns.org:8123" created, albeit unencrypted:

Change to HTTPS
After the Let's Encrypt certificate is available through the DuckDNS add-on, Home Assistant must be configured to use it.
By adding the following line to configuration.yaml, Home Assistant will switch to https:
http:
  ssl_certificate: /ssl/fullchain.pem
  ssl_key: /ssl/privkey.pem
Attention: From now on, Home Assistant can only be called with a prefixed https, this also applies to the default URL:https://homeassistant.local:8123. Alternatively, https:// and the IP address of Home Assistant with port 8123 can be used in the local network:
A warning is issued when using the IP address of Home Assistant: This is not a secure connection. The reason for this is that the IP address does not match the name of the certificate. The warning can therefore be ignored and disappears when calling via the Duck DNS domain.
Goal achieved: Home Assistant can now be reached via https://???.duckdns.org:8123 with an encrypted connection from the Internet:

Add-on vs. integration
There is also an integration for Duck DNS, this only takes care of keeping the DNS entry synchronized with the IP address of the Internet provider. The Duck DNS add-on also keeps the DNS entry synchronized and also takes care of issuing and renewing Let's Encrypt certificates for encrypted access to the local Home Assistant installation. If, on the other hand, only the issuing and renewal of Let's Encrypt certificates is required, the AddOn: LetzEncrypt can be used:
Alternative to Duck DNS: any DNS entry and Let's Encrypt add-on
If you have already registered a domain on the Internet and the public IP address of your Internet access does not change, you can use the Let's Encrypt add-on instead of the Duck DNS add-on.
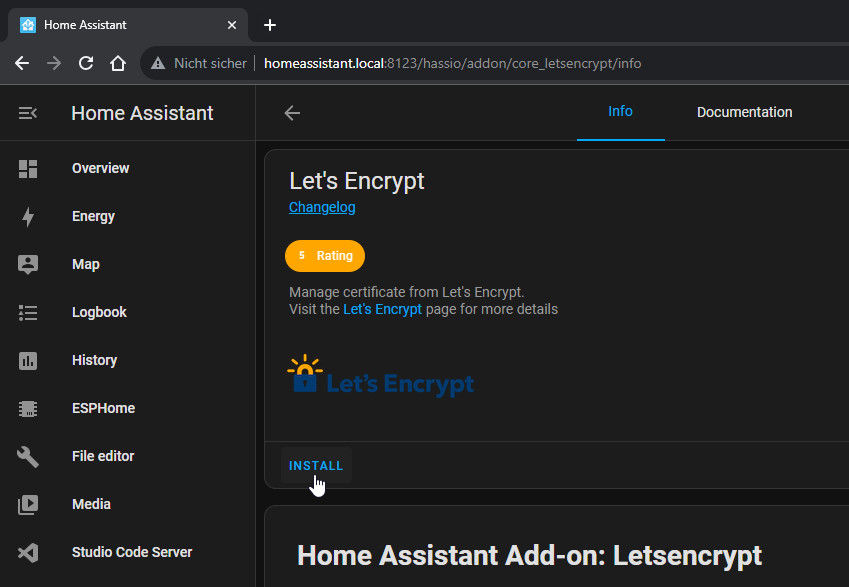
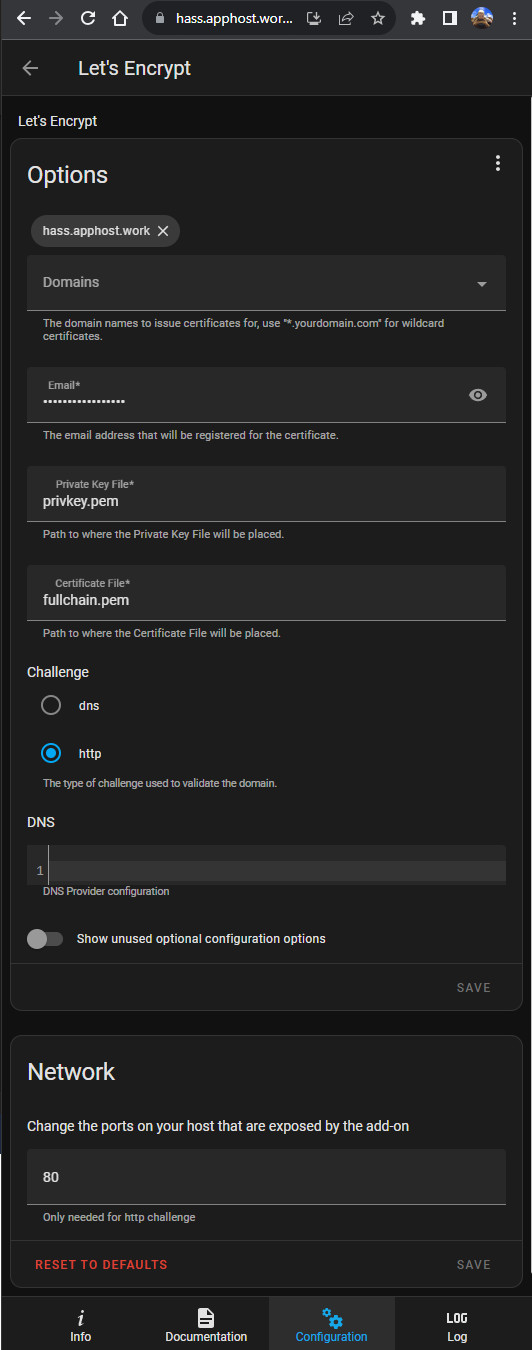
In the options, the AddOn now requires the information about the DNS record used (A record) and the email address for any warnings or information about the certificate:
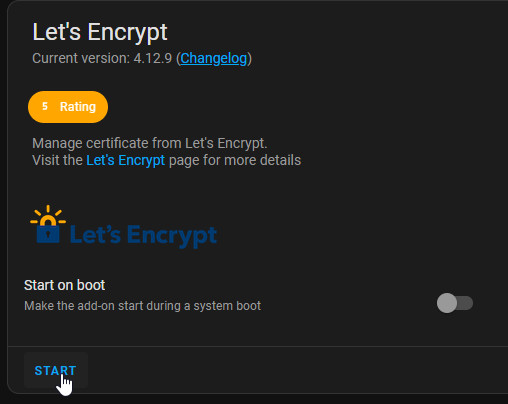
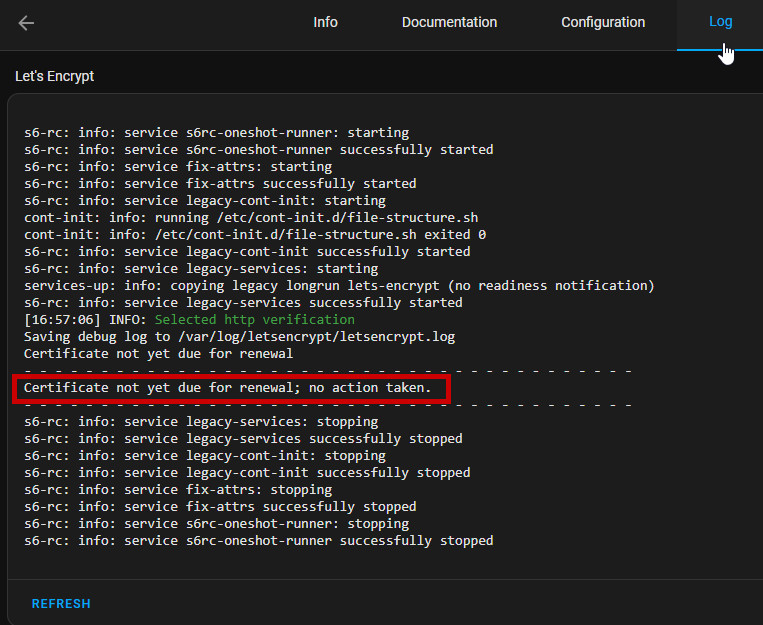
After starting the add-on, it takes care of issuing and renewing the certificate. A look at the log at this point shows that a certificate has already been issued and no further action is required:
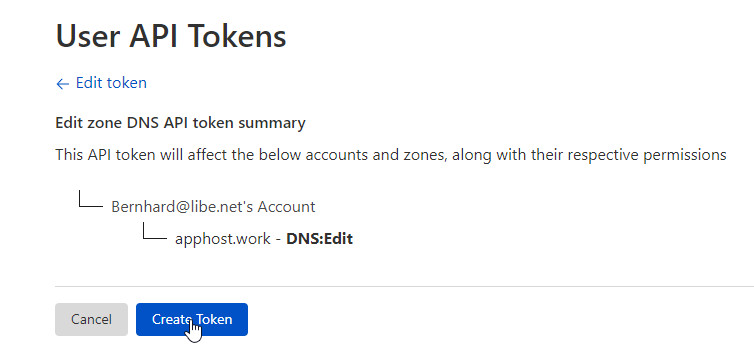
Test with Cloudflare API token
The API token can be requested on the Cloudflare website using "Get your API token":
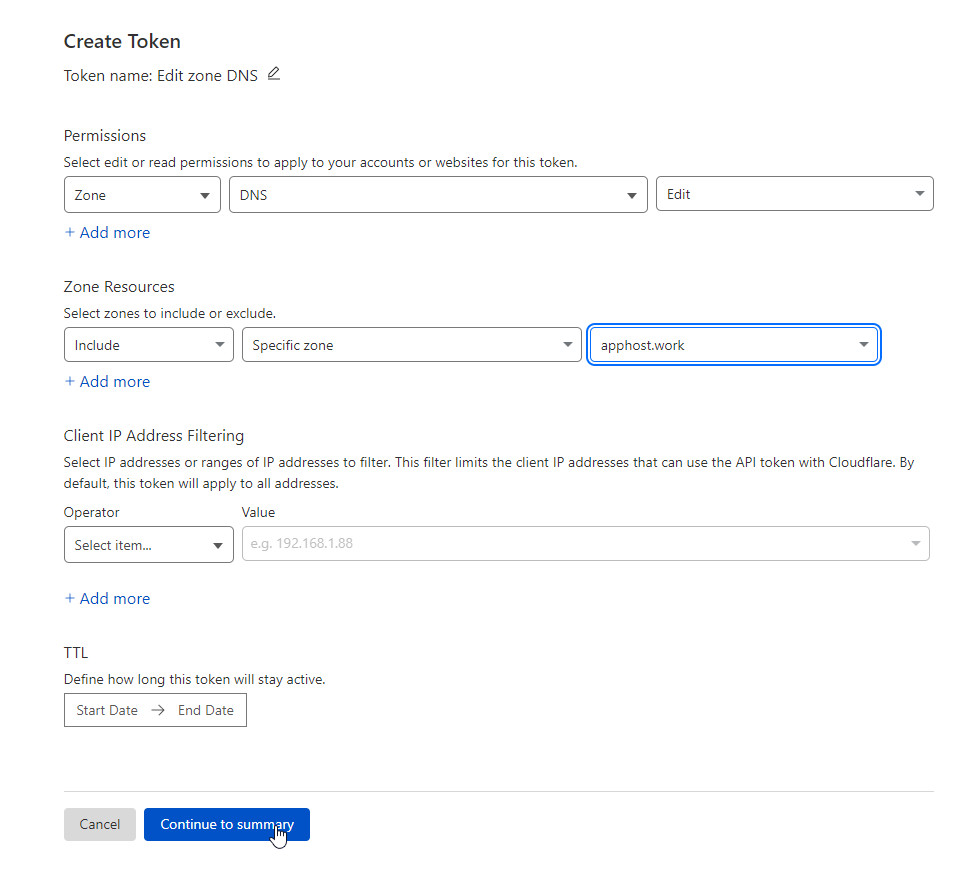
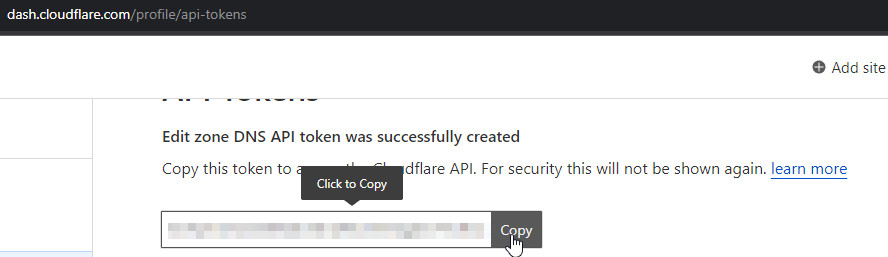
The token, can then be deposited in "Options" and DNS as follows:
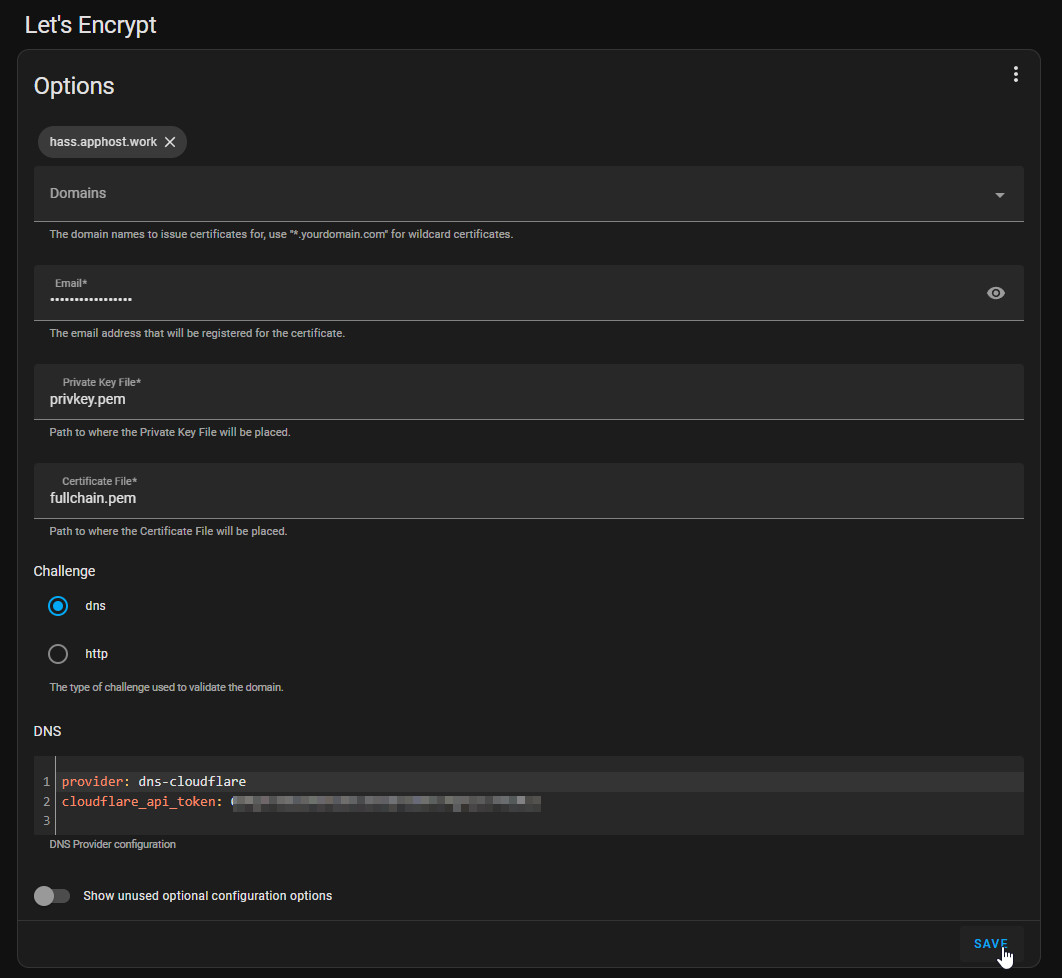
provider: dns-cloudflare
cloudflare_api_token: ???
A look at the log shows us if the certificate could be issued successfully:

Alternative port
If for some reason the Internet provider blocks port 443 incoming, Home Assistant can also be operated on another port, for example on the standard port 8123:


Diligence tasks / possibly to be considered
Optional access without: 8123
If you prefer access without 8123, you can use 443 as the source port for port forwarding on the router.
Internal access directly to the IP address of Home Assistant
To ensure that the public IP address of the Internet access is not always used for access from your own network, e.g. via WLAN, a DNS entry for the Duck DNS domain with the local IP address of Home Assistant can be added to the router.
Fixing or reserving an IP address for Home Assistant in the internal network
If Home Assistant does not use a fixed IP address in the internal network and if the router does not remember the IP addresses already assigned, Home Assistant may be assigned a different IP address and port forwarding will not work. As a solution, the IP address could either be set to a specific value (no DHCP: manual IP) or a DHCP reservation could be created on the router for the IP address already assigned.
Finally, a word about security:
To secure access from the Internet, all Home Assistant users should use strong passwords and enable MFA if possible.
 ({{pro_count}})
{{percentage}} % positive
 ({{con_count}})