WordPress in Docker incl. HTTPS Let's Encrypt setup

The currently most widespread blogging software WordPress can be operated easily and cost-effectively in Docker containers, among other things. A virtual server or cloud server from a well-known hosting provider can be used as a server, see also: Provider change HostEurope vs Hetzner, vServer vs Cloud Server. If you are not afraid of running your own web server, you can use the setup presented here torun one or more WordPress sites onit, including a free https certificate. The cost of a virtual server starts from 4 $ per month, which is already relatively cheap for running a single website.
Profile:
| Software | WordPress |
|---|---|
| Hersteller | https://wordpress.org |
| aktuelle Version | 6.5 |
| (found: 2024-04-03) | |
Docker Basics
Docker allows applications to be launched by command in a so-called container.A container is an isolated environment independent of the operating system (OS):
When a container is first launched, Docker independently loads all the necessary sources
from the internet.
Docker can be installed on Windows, macOS or an Linux Distribution
To ensure that WordPress is can be reached securely from the Internet, I use a Let's Encrypt reverse proxy. At first I used Nginx as Reverse-Proxy, but later replaced it with Traefik. The reverse proxy provides an encrypted HTTPS connection and makes it possible to run multiple websites on one server.
Step by step WordPress and Docker including access from the internet
Hardware requirement:- Almost any hardware can be used for the Docker installation. For example, a virtual server of a provider, or for home: a Mini-PC, notebook, MAC, a NAS: QNAP, Synology or any other hardware with x68-64 architecture on which Windows or Linux can be installed.
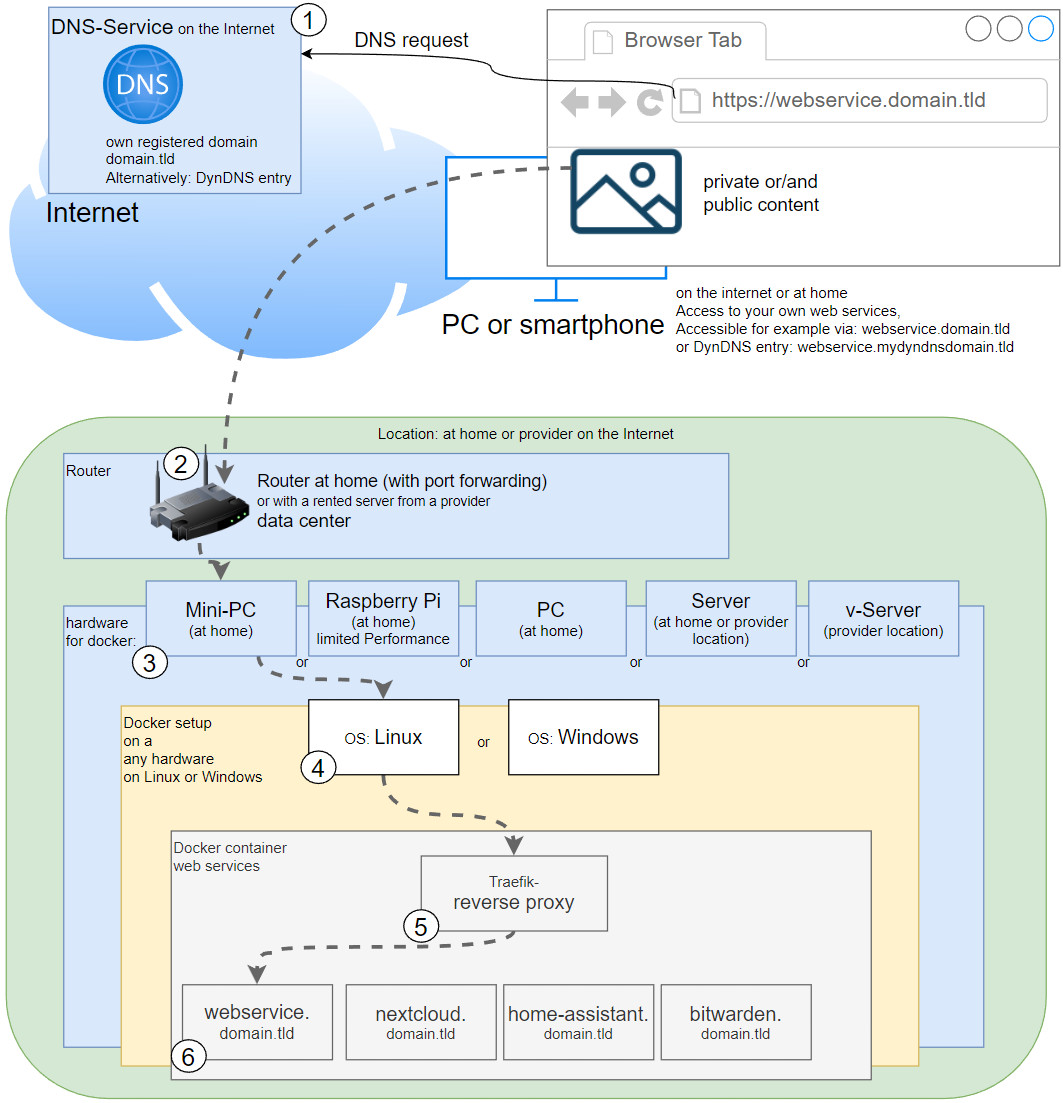
Schematic representation: Access from the Internet
- Own registered domain, see domain and its management.
- Cloudflare or Reverse Proxy:
- Cloudflare Tunnel Service or alternatively:
- Port forwarding and Reverse proxy with Let's Encrypt certificate
- create and customize docker-compose.yml
- Start container and
- Setup
WordPress Docker Compose
To start WordPress using docker compose, you can use the official Docker WordPress image and MySQL as database .Both images can be downloaded, created and started with a simple docker-compose.yml file. The file can be filled with any text editor as follows and then customized:
Filename: docker-compose.yml, Content:
version: '3.1'

services:

  wordpress:
    image: wordpress
    restart: always
    expose:
      - 80
   #For direct test access, remove "#" in the following 2 lines. Call: http://localhost:83 or http://ServerIP:83
    #ports:
      #- "83:80"
    environment:
      WORDPRESS_DB_HOST: wordpress_db
      WORDPRESS_DB_USER: exampleuser
      WORDPRESS_DB_PASSWORD: examplepass
      WORDPRESS_DB_NAME: exampledb

    #Labels for ReverseProxy, see: https://www.libe.net/en-traefik
    labels:
      - "traefik.enable=true"
      - "traefik.http.routers.wordpress.rule=Host(`wp.domain.tld`)"
      - "traefik.http.routers.wordpress.entrypoints=web"
      - "traefik.http.routers.wordpress.entrypoints=websecure"
      - "traefik.http.routers.wordpress.tls.certresolver=myresolver"
      - "traefik.http.services.wordpress.loadbalancer.server.port=80"
    volumes:
      - wordpress:/var/www/html

  wordpress_db:
    image: mysql:5.7
    restart: always
    environment:
      MYSQL_DATABASE: exampledb
      MYSQL_USER: exampleuser
      MYSQL_PASSWORD: examplepass
      MYSQL_RANDOM_ROOT_PASSWORD: '1'
    volumes:
      - wordpress-db:/var/lib/mysql

volumes:
  wordpress:
  wordpress-db:

#Without using a reverse proxy (https://www.libe.net/en-traefik) the webproxy network is likely to be missing
#and the following lines can be removed or commented out. Alternatively, the network can be created with "docker network create webproxy".
networks:
  default:
    external:
      name: webproxy
For direct access via IP address or localhost - even without reverse proxy, DNS or public IP - the commented out port setting can be activated for test purposes byremoving"#" in front of "ports" and "-"83:80"" .
For Internet access via the Traefik reverse proxy, the domain must be replaced in the labels with the previously created DNS entries (in the example: wp.domain.tld). The example uses docker volumes rather than bind mounts for permanently storing data. See: Docker data storage: Docker Volumes vs Host Folders
Start container
The start is done from the folder of the docker-compose.yml file with the command "docker compose up":
docker compose up -dStartup / first call of the web interface
When calling the specified domain(https://wp.domain.tld) ,the WordPress setup reports. When testing on your own computer and activating port 83, the call can also be made directly without the Internet via the URLs http://localhost:83 or http://ServerIP:83.

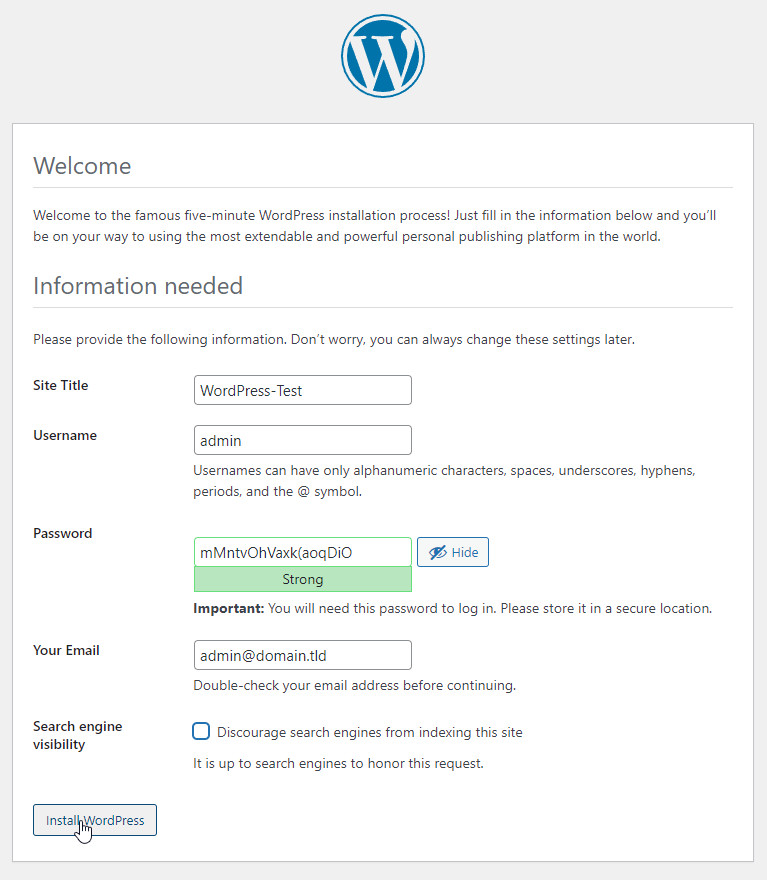
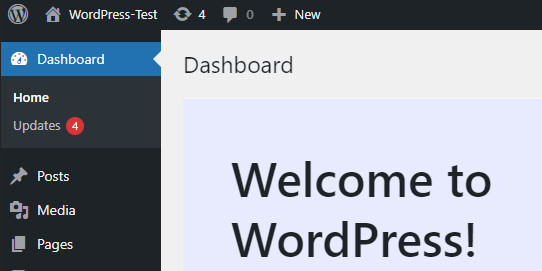
https://wp.domain.tld/wp-admin/ :
Show Docker logs
If something is not working with the setup, it may be worthwhile to take a look at the log files of the web container:
docker logs wordpress_wordpress_1 -fDocker Admin Interface
For easy management of Docker containers via a web interface, see also: Docker Admin Interface: Portainer Community Edition
 ({{pro_count}})
{{percentage}} % positive
 ({{con_count}})