Monitor websites with Uptime Kuma

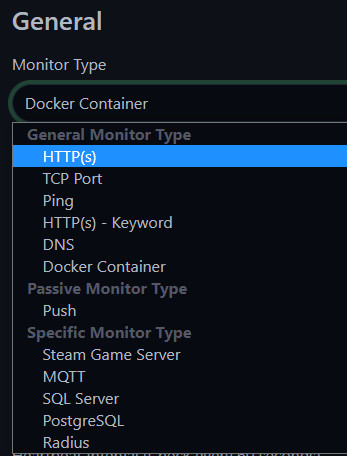
Uptime Kuma makes it quick and easy to set up monitoring for various websites. The available monitor types range from a simple ping, to a port check, to monitoring specific services:
Profile:
| Software | Uptime-kuma |
|---|---|
| GitHub | https://github.com/louislam/uptime-kuma |
| current version | 2.2.1 |
| found | 2026-03-12 |
Docker Basics
Docker allows applications to be launched by command in a so-called container.A container is an isolated environment independent of the operating system (OS):
When a container is first launched, Docker independently loads all the necessary sources
from the internet.
Docker can be installed on Windows, macOS or an Linux Distribution
To ensure that Uptime Kuma is can be reached securely from the Internet, I use a Let's Encrypt reverse proxy. At first I used Nginx as Reverse-Proxy, but later replaced it with Traefik. The reverse proxy provides an encrypted HTTPS connection and makes it possible to run multiple websites on one server.
Step by step Uptime Kuma and Docker including access from the internet
Hardware requirement:- Almost any hardware can be used for the Docker installation. For example, a virtual server of a provider, or for home: a Mini-PC, notebook, MAC, a NAS: QNAP, Synology or any other hardware with x68-64 architecture on which Windows or Linux can be installed.
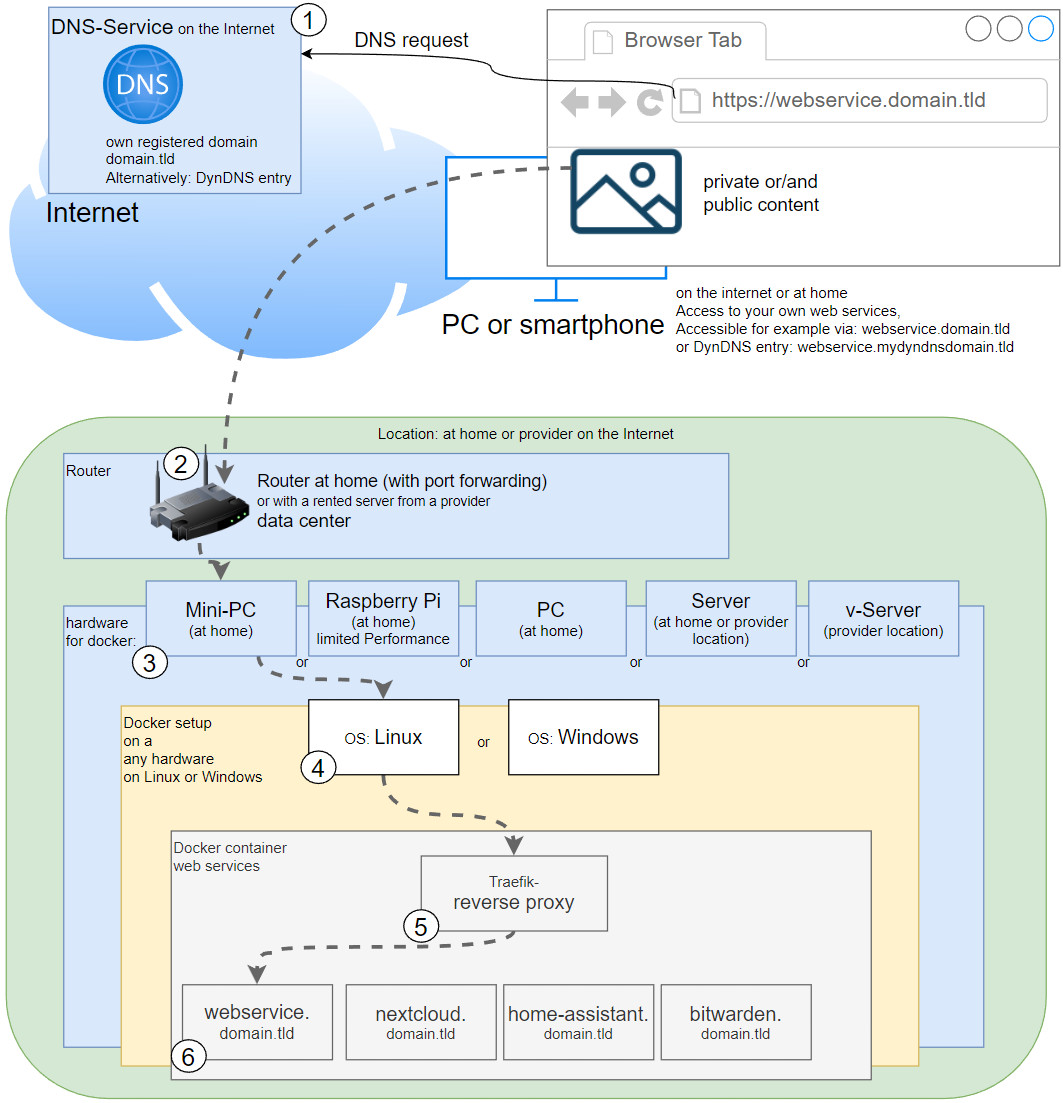
Schematic representation: Access from the Internet
- Own registered domain, see domain and its management.
- Cloudflare or Reverse Proxy:
- Cloudflare Tunnel Service or alternatively:
- Port forwarding and Reverse proxy with Let's Encrypt certificate
- docker-compose.yml create and customize
- Start container and
- Setup
docker-compose.yml file:
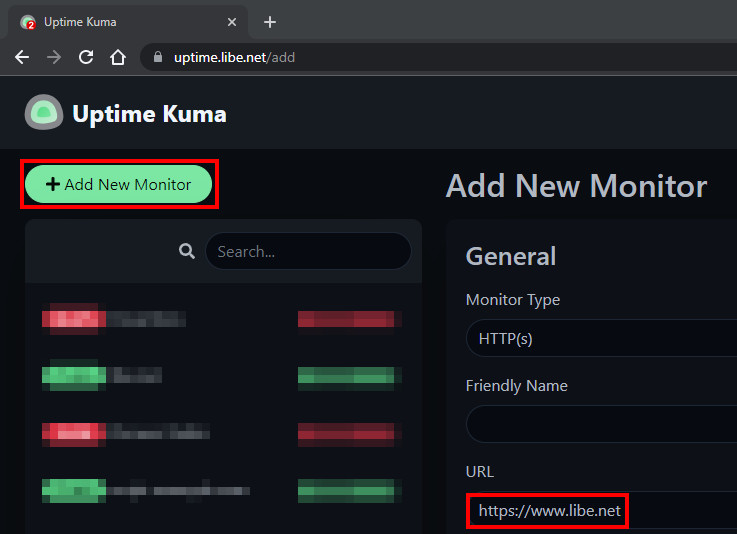
To launch Uptime Kuma using docker compose, the official Docker image can be used. The image can be downloaded, created and launched using a simple docker-compose.yml file. The file can be filled with any text editor as follows and then customized:
Filename: docker-compose.yml, Content:
services:
  uptime-web:
    image: louislam/uptime-kuma
    container_name: uptime-kuma
    restart: always
    expose:
      - 3001
   #For direct test access, remove "#" in the following 2 lines. Call: http://localhost:3001 or http://ServerIP:3001
    #ports:
      #- "3001:3001"
    #Labels for ReverseProxy, see: https://www.libe.net/en-traefik
    labels:
      - "traefik.enable=true"
      - "traefik.http.routers.uptime.rule=Host(`uptime.domain.tld`)"
      - "traefik.http.routers.uptime.entrypoints=web"
      - "traefik.http.routers.uptime.entrypoints=websecure"
      - "traefik.http.routers.uptime.tls.certresolver=myresolver"
      - "traefik.http.services.uptime.loadbalancer.server.port=3001"

    volumes:
      -  ./data:/app/data

#Without using a reverse proxy (https://www.libe.net/en-traefik) the webproxy network is likely to be missing
#and the following lines can be removed or commented out. Alternatively, the network can be created with "docker network create webproxy".
networks:
  default:
    name: webproxy
    external: true
For direct access via IP address or localhost - also without a reverse proxy, DNS or public IP - the commented out port setting can be activated for test purposes by adding "#" in front of "ports" and "-"3001:3001"" is removed. For Internet access via the Traefik Reverse Proxy, the domain must be replaced in the labels with the previously created DNS records (in the example: uptime.domain.tld). The example uses Bind mounts and not volumes for permanently storing the data.[!Template.FutureLink:Docker Volumes vs Bind Mounts| See: Docker data storage: Docker volumes vs. host folders.!]]
Launch container
The startup is done from the folder of the docker-compose.yml file with the command""docker compose up":
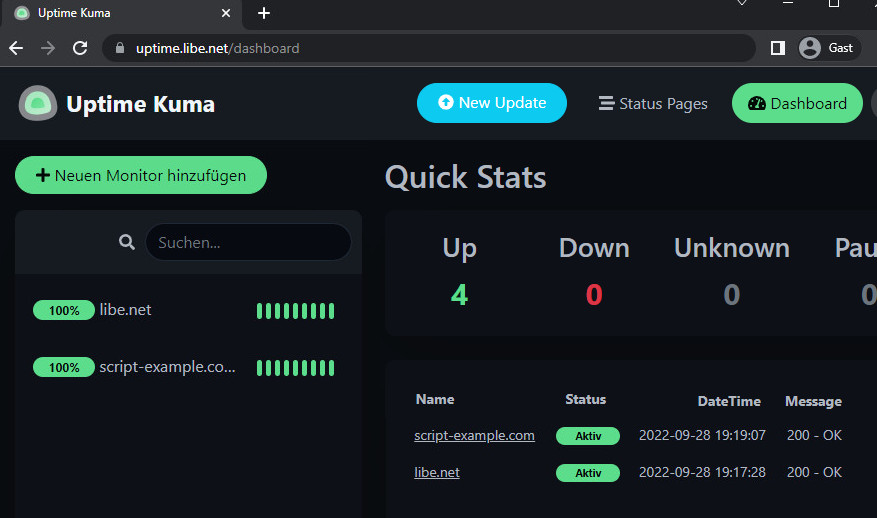
docker compose up -dStartup / first call of the web interface
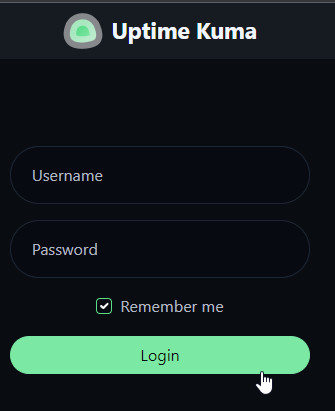
Start the Web interface using the URL used in the config: for example: https://uptime.domain.tld. For the first login a User have to be created, which later can be used for logon:
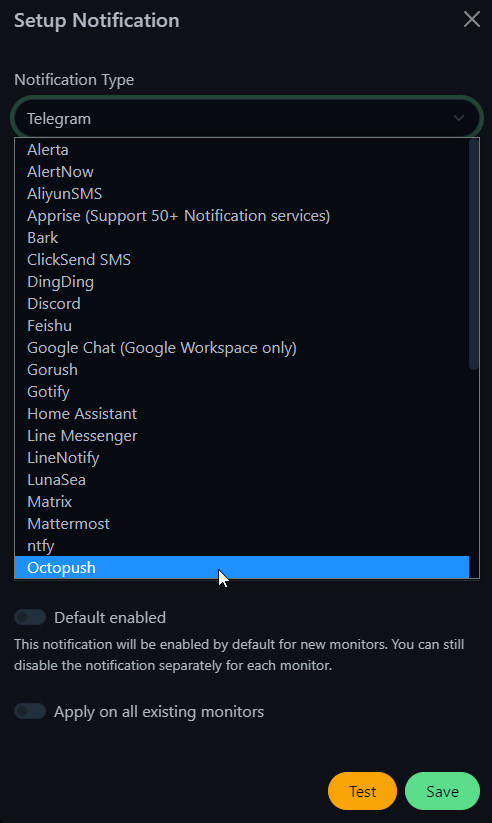
Alerts: notification for the following services:

- AlertNow
- AliyunSMS
- Apprise (support for 50+ notification services)
- Bark
- ClickSend SMS
- DingDing
- Discord
- Feishu
- Google Chat (Google Workspace only)
- Gorush
- Gotify
- Home Assistant
- Line Messenger
- LineNotify
- LunaSea
- Matrix
- Mattermost
- ntfy
- Octopush
- OneBot
- PagerDuty
- PromoSMS
- Pushbullet
- Push by Techulus
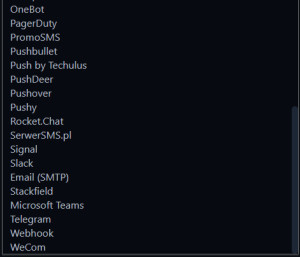
- Push Deer
- Pushover
- Pushy
- Rocket.chat
- SerwerSMS.pl
- Signal
- Slack
- Email (SMTP)
- Stackfield
- Microsoft Teams
- Telegram
- Webhook
- WeCom

Für eine Signal-Integration, siehe: Signal cli rest API
Conclusion
With Uptime Kuma it is very quickly possible to set up simple monitoring for devices and measure availability. In addition, Uptime Kuma offers the ability to send notifications through a variety of providers.
 ({{pro_count}})
{{percentage}} % positive
 ({{con_count}})