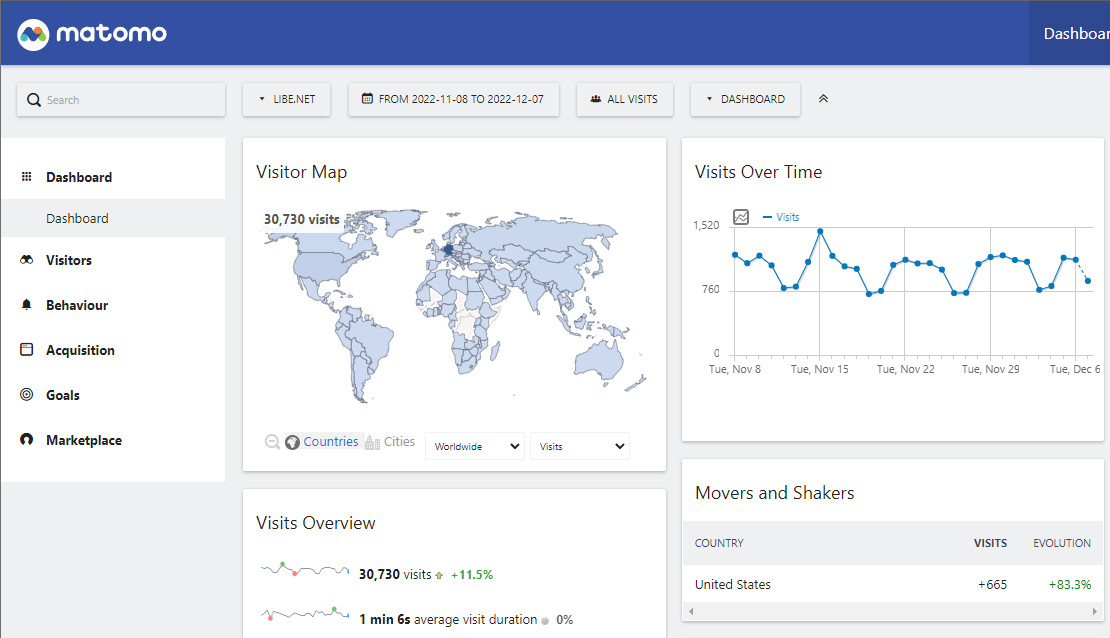
Visitor statistics: Matomo, Google Analytic replacement self-hosting

For those who already use Docker, the open source web analytics software Matomo to easily collect and analyze visitor statistics for their own websites. Unlike Google Analytics, this does not allow the data to be sent to a cloud service, but rather collected on your own self-hosted server.
Profile:
| Software | Matomo |
|---|---|
| GitHub | https://github.com/matomo-org/matomo |
| current version | 5.8.0 |
| found | 2026-03-07 |
Docker Basics
Docker allows applications to be launched by command in a so-called container.A container is an isolated environment independent of the operating system (OS):
When a container is first launched, Docker independently loads all the necessary sources
from the internet.
Docker can be installed on Windows, macOS or an Linux Distribution
To ensure that Matomo is can be reached securely from the Internet, I use a Let's Encrypt reverse proxy. At first I used Nginx as Reverse-Proxy, but later replaced it with Traefik. The reverse proxy provides an encrypted HTTPS connection and makes it possible to run multiple websites on one server.
Step by step Matomo and Docker including access from the internet
Hardware requirement:- Almost any hardware can be used for the Docker installation. For example, a virtual server of a provider, or for home: a Mini-PC, notebook, MAC, a NAS: QNAP, Synology or any other hardware with x68-64 architecture on which Windows or Linux can be installed.
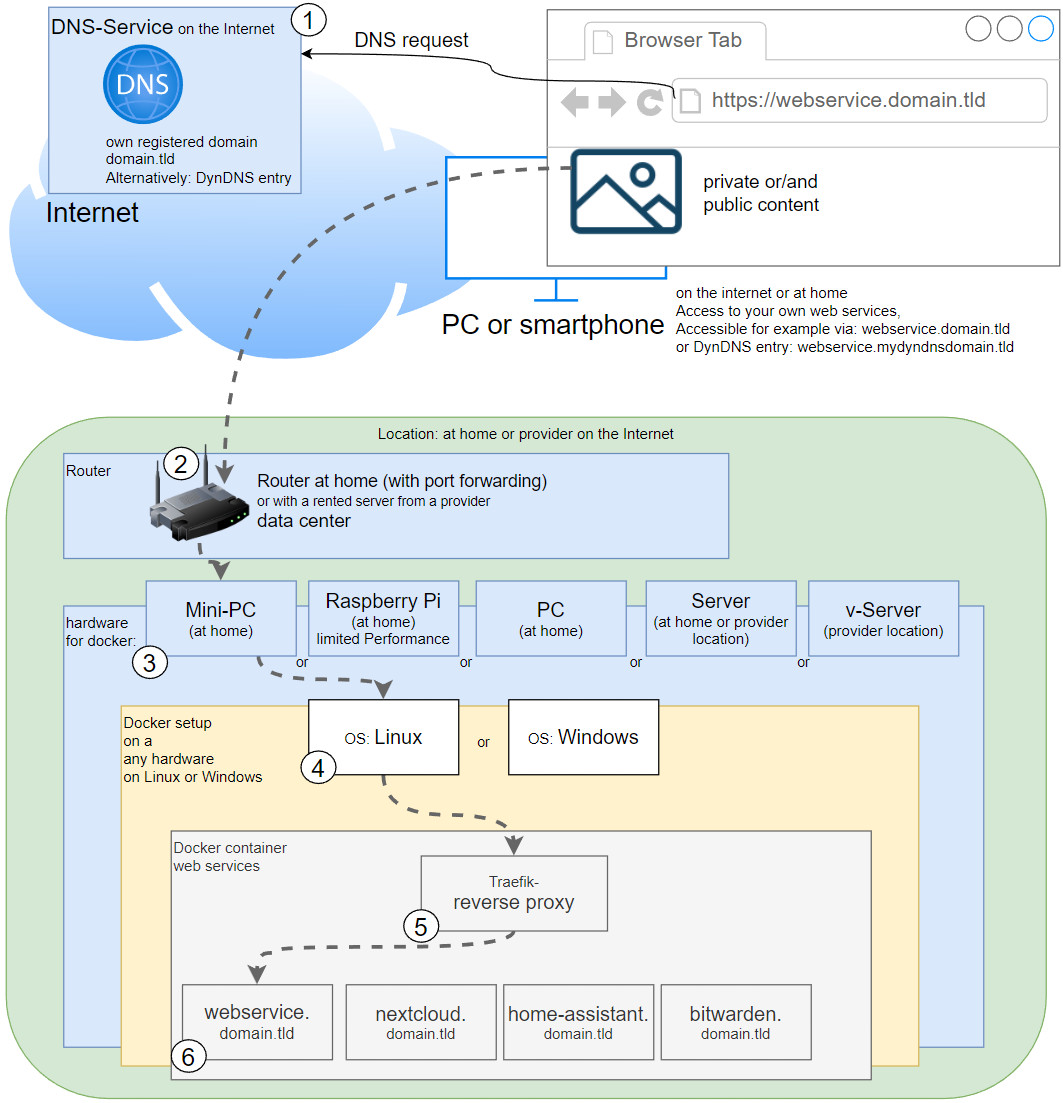
Schematic representation: Access from the Internet
- Own registered domain, see domain and its management.
- Cloudflare or Reverse Proxy:
- Cloudflare Tunnel Service or alternatively:
- Port forwarding and Reverse proxy with Let's Encrypt certificate
- create docker-compose.yml, matomo.conf, db.env and customize it
- Start the containers and
- Setup
Matomo Docker Compose
To launch Matomo using docker compose, the official Docker Matomo image can be used and MariaDB can be used as the database. Both images can be downloaded, created and launched with a simple docker-compose.yml file. The file can be filled with any text editor as follows and then customized:
Filename: docker-compose.yml, Content:
services:
  db:
    image: mariadb
    container_name: matomo-db
    command: --max-allowed-packet=64MB
    restart: always
    volumes:
      - ./db:/var/lib/mysql
    env_file:
      - ./db.env
  app:
    image: matomo:fpm-alpine
    restart: always
    container_name: matomo-app
    links:
      - db
    volumes:
      - ./data:/var/www/html
    environment:
      - MATOMO_DATABASE_HOST=db
      - PHP_MEMORY_LIMIT=2048M
    env_file:
      - ./db.env
  web:
    image: nginx:alpine
    container_name: matomo-web
    restart: always
    volumes:
      - ./data:/var/www/html:ro
      # see https://github.com/matomo-org/matomo-nginx
      - ./matomo.conf:/etc/nginx/conf.d/default.conf:ro
    expose:
      - "80"
   #For direct test access, remove "#" in the following 2 lines. Call: http://localhost:80 or http://ServerIP:80
    #ports:
      #- "80:80"
    #Labels for ReverseProxy, see: https://www.libe.net/en-traefik
    labels:
      - "traefik.enable=true"
      - "traefik.http.routers.matomo.rule=Host(`analytics.domain.tld`)"
      - "traefik.http.routers.matomo.entrypoints=web"
      - "traefik.http.routers.matomo.entrypoints=websecure"
      - "traefik.http.routers.matomo.tls.certresolver=myresolver"
#Without using a reverse proxy (https://www.libe.net/en-traefik) the webproxy network is likely to be missing
#and the following lines can be removed or commented out. Alternatively, the network can be created with "docker network create webproxy".
networks:
  default:
    name: webproxy
    external: true
For direct access via IP address or localhost - also without reverse proxy, DNS or public IP - the commented out port setting can be activated for test purposes by adding "#" in front of "ports" and "-"80:80"" is removed. For Internet access via the Traefik reverse proxy, the domain must be replaced in the labels with the previously created DNS records (in the example: uptime.domain.tld). The example uses Bind mounts and not volumes for permanently storing the data. See: Docker data storage: Docker volumes vs. host folders.
Additionally, I created the following configuration file in the folder:
upstream php-handler {
	server app:9000;
}
    gzip  on;
    gzip_vary on;
    gzip_min_length 10240;
    gzip_proxied any;
    gzip_disable msie6;
    gzip_comp_level 1;
    gzip_buffers 16 8k;
    gzip_http_version 1.1;
    gzip_types text/plain text/css application/json application/javascript text/xml application/xml application/xml+rss text/javascript;


server {
	listen 80;

	add_header Referrer-Policy origin; # make sure outgoing links don't show the URL to the Matomo instance
	root /var/www/html; # replace with path to your matomo instance
	index index.php;
	try_files $uri $uri/ =404;


	## only allow accessing the following php files
	location ~ ^/(index|matomo|piwik|js/index|plugins/HeatmapSessionRecording/configs).php {
		# regex to split $uri to $fastcgi_script_name and $fastcgi_path
		fastcgi_split_path_info ^(.+\.php)(/.+)$;

		# Check that the PHP script exists before passing it
		try_files $fastcgi_script_name =404;

		include fastcgi_params;
		fastcgi_param SCRIPT_FILENAME $document_root$fastcgi_script_name;
		fastcgi_param PATH_INFO $fastcgi_path_info;
		fastcgi_param HTTP_PROXY ""; # prohibit httpoxy: https://httpoxy.org/
		fastcgi_pass php-handler;
	}

	## deny access to all other .php files
	location ~* ^.+\.php$ {
		deny all;
		return 403;
	}

	## disable all access to the following directories
	location ~ /(config|tmp|core|lang) {
		deny all;
		return 403; # replace with 404 to not show these directories exist
	}
	location ~ /\.ht {
		deny all;
		return 403;
	}

	location ~ js/container_.*_preview\.js$ {
		expires off;
		add_header Cache-Control 'private, no-cache, no-store';
	}

	location ~ \.(gif|ico|jpg|png|svg|js|css|htm|html|mp3|mp4|wav|ogg|avi|ttf|eot|woff|woff2|json)$ {
		allow all;
		## Cache images,CSS,JS and webfonts for an hour
		## Increasing the duration may improve the load-time, but may cause old files to show after an Matomo upgrade
		expires 1h;
		add_header Pragma public;
		add_header Cache-Control "public";
	}

	location ~ /(libs|vendor|plugins|misc/user) {
		deny all;
		return 403;
	}

	## properly display textfiles in root directory
	location ~/(.*\.md|LEGALNOTICE|LICENSE) {
		default_type text/plain;
	}
}

# vim: filetype=nginx
And the variables in the db.env file.
MYSQL_PASSWORD=mySecurePassword
MYSQL_ROOT_PASSWORD=mySuperSecurePassword
MYSQL_DATABASE=matomo
MYSQL_USER=matomo
MATOMO_DATABASE_ADAPTER=mysql
MATOMO_DATABASE_TABLES_PREFIX=matomo_
MATOMO_DATABASE_USERNAME=matomo
MATOMO_DATABASE_PASSWORD=mySecurePassword
MATOMO_DATABASE_DBNAME=matomo
Once the 3 files have been created and customized, the container can be started:
Start container
The start is done from the folder of the docker-compose.yml file with the command "docker compose up":
docker compose up -dStartup / first call of the web interface
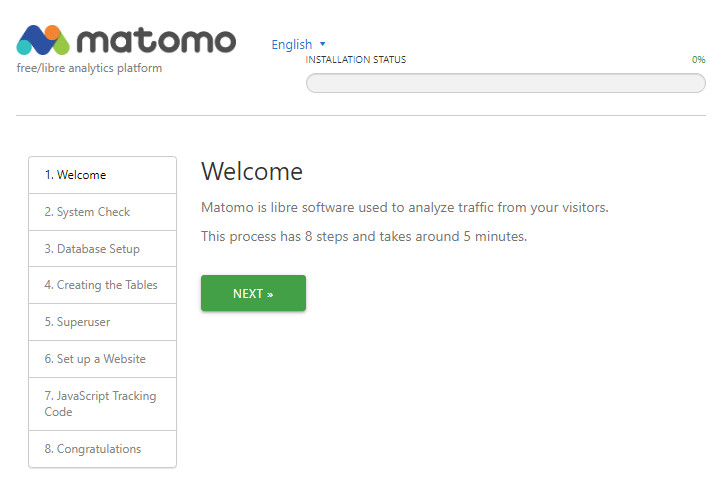
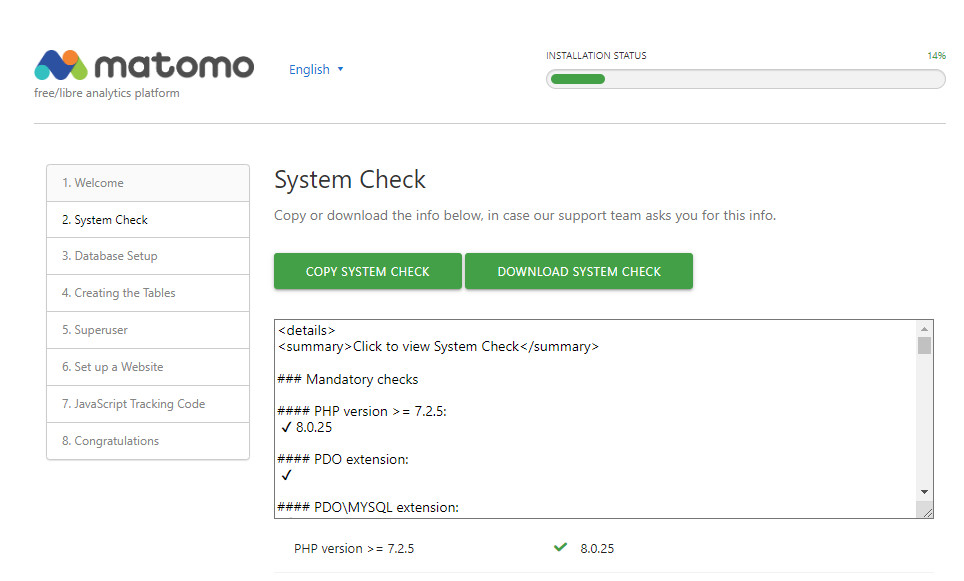
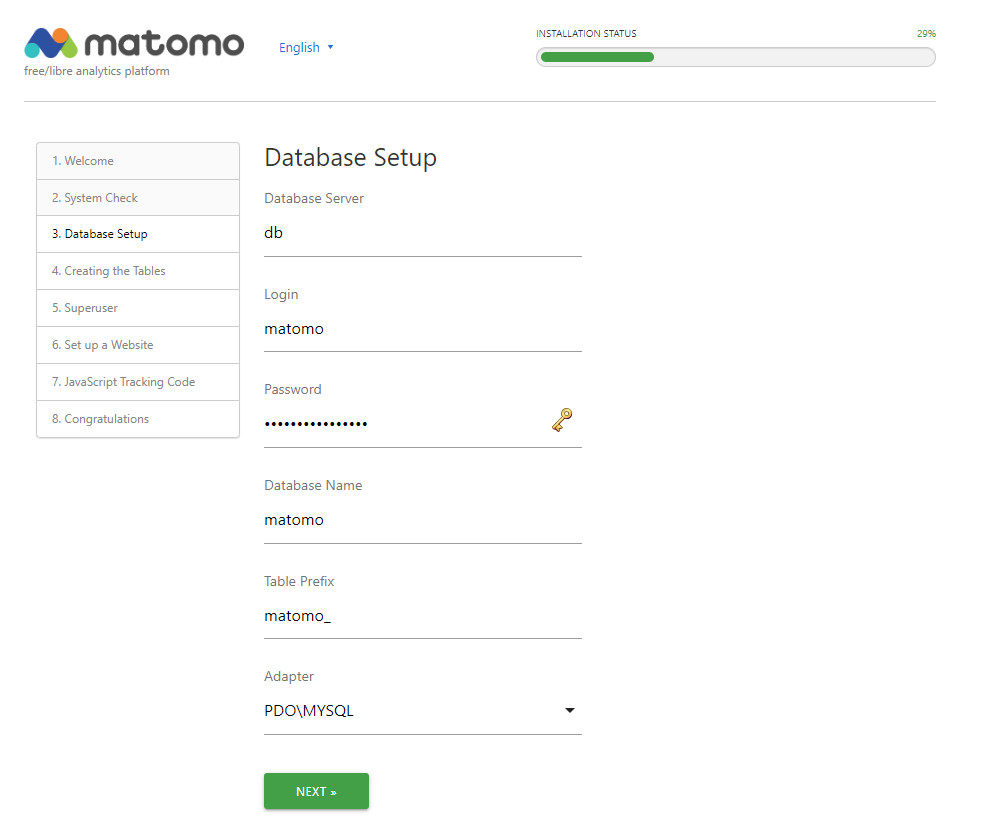
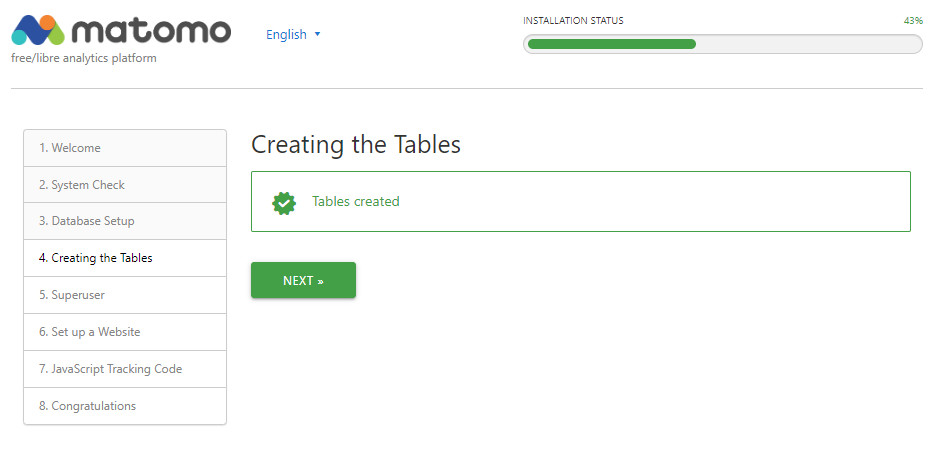
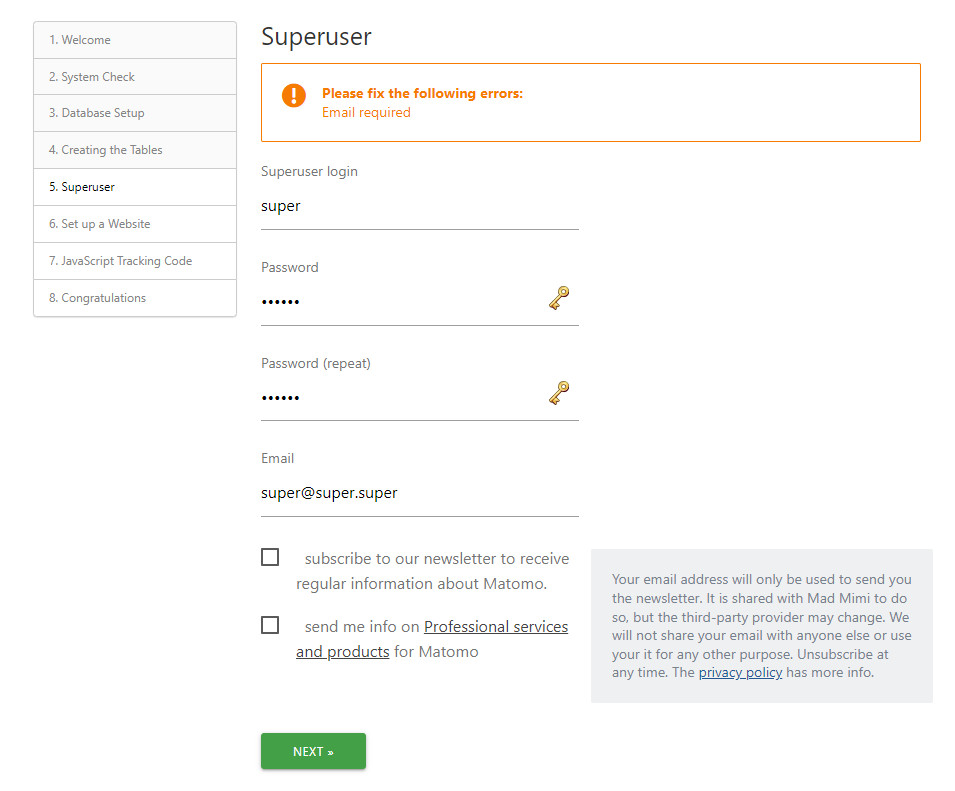
After startup, Matomo should be accessible from the specified domain. The first call leads through the setup wizard:
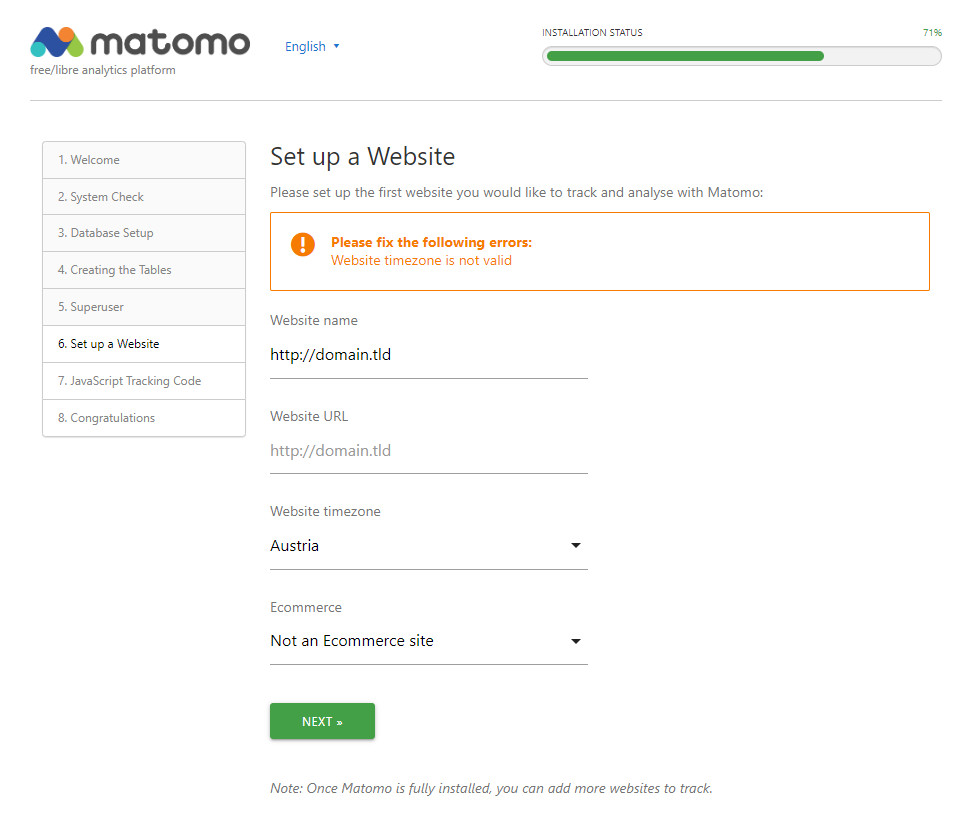
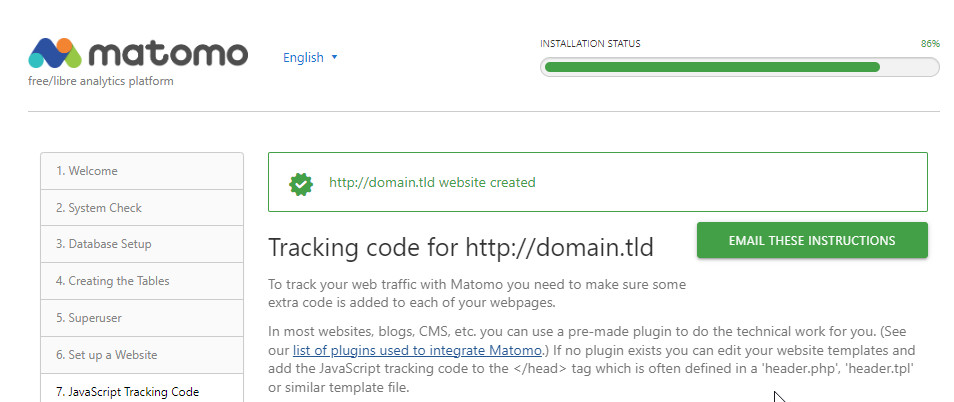
Once Matomo is set up, websites can be created. In order for the counter to start tracking, a tracking code must of course be stored on the website itself: here are the possible options:
- TRACKING WITH JAVASCRIPT
- TRACKING USING AN IMAGE
- IMPORT SERVER LOG FILES
- MOBILE APPLICATIONS AND SDKS
- HTTP TRACKING API
- SINGLE PAGE APPLICATION OR
- PROGRESSIVE WEB APP
In order to not affect the loading of the website, I placed the tracking code at the end of the website inside the body element:
The tracking code can be found under Websites / Tracking Code:
Here is an example:
<!-- Matomo -->
<script>
var _paq = window._paq = window._paq || [];
  /* tracker methods like "setCustomDimension" should be called before "trackPageView" */
  _paq.push(['trackPageView']);
  _paq.push(['enableLinkTracking']);
  (function() {
    var u="//analytics.domain.tld/";
    _paq.push(['setTrackerUrl', u+'matomo.php']);
    _paq.push(['setSiteId', '5']);
    var d=document, g=d.createElement('script'), s=d.getElementsByTagName('script')[0];
    g.async=true; g.src=u+'matomo.js'; s.parentNode.insertBefore(g,s);
  })();
</script>
<!-- End Matomo Code -->
For WordPress, there is also a plugin for Matomo, see: wordpress.org/plugins/wp-piwik/.
For those who want to host WordPress themselves, see: WordPress in Docker incl. HTTPS Let's Encrypt setup.
 ({{pro_count}})
{{percentage}} % positive
 ({{con_count}})