Home Assistant: Docker startup + SSL Internet access

Besides installing it on its own hardware, the second recommended installation option for Home Assistant is to use Docker, see also: HAOS vs. Home Assistant Docker Installation. To run Home Assistant in Docker, a Docker setup is of course required, see: Docker. Those who already have Docker setup can start Home-Assistant with the following command:
Docker Basics
A container is an isolated environment independent of the operating system (OS):
When a container is first launched, Docker independently loads all the necessary sources
from the internet.
Docker can be installed on Windows, macOS or an Linux Distribution
docker run -d --name="home-assistant" \
-v ha:/config \
-v /etc/localtime:/etc/localtime:ro \
--net=host \
--restart=always \
homeassistant/home-assistant:stable
The network for Home-Assistant must be set to "--net=host" according to the vendor, but the ports used can also be defined: as an example when using a reverse proxy for access from the Internet, see: Access from the Internet - SSL Let's Encrypt.
First start: Initial configuration
After starting the container, Home-Assistant is accessible by default with the IP address of the host and port 8123 in the browser:
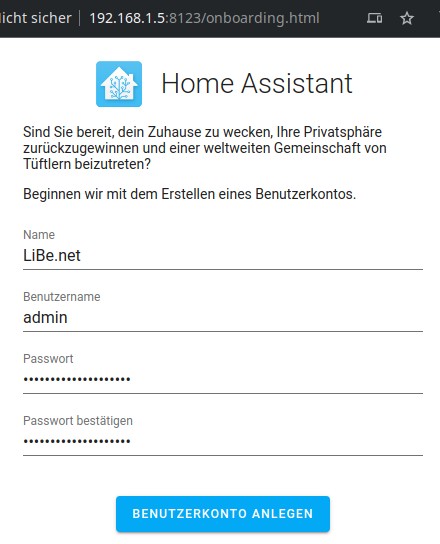
Those running Docker on the same machine can also use http://localhost:8123 for the call, see calling localhost: IP address "127.0.0.1", "::1" | what is localhost?
Access from the Internet: SSL Let's Encrypt
Thanks to Let's Encrypt, Home Assistant can easily be provided with an SSL certificate and thus be operated securely on the Internet. As a prerequisite I have the following setup in use: Traefik in Docker | multiple web servers incl. certificate SSL.
For the operation with the reverse proxy I made the following settings in the configuration:
configuration.yaml:
http:
  server_port: 8123
  use_x_forwarded_for: true
  trusted_proxies:
    - 127.0.0.1
    - ::1
    - 172.18.0.0/16
I use the network "webproxy" for the web containers that are accessible from the Internet via the Let's Encrypt reverse proxy. Accordingly, I created the following docker-compose file for Home Assistant:
docker-compose.yml
services:
  hass:
    image: homeassistant/home-assistant:stable
    container_name: home-assistant
    #Labels for ReverseProxy, see: https://www.libe.net/en-traefik
    labels:
      - "traefik.enable=true"
      - "traefik.http.routers.ha.rule=Host(`ha.domain.tld`)"
      - "traefik.http.routers.ha.entrypoints=web"
      - "traefik.http.routers.ha.entrypoints=websecure"
      - "traefik.http.routers.ha.tls.certresolver=myresolver"
      - "traefik.http.services.ha.loadbalancer.server.port=8123"
    restart: always
    volumes:
      - ./haconfig:/config
      - /etc/timezone:/etc/timezone:ro
      - /etc/localtime:/etc/localtime:ro
    expose:
       - "8123"
   #For direct test access, remove "#" in the following 2 lines. Call: http://localhost:8123 or http://ServerIP:8123
    #ports:
      #- "8123:8123"
#Without using a reverse proxy (https://www.libe.net/en-traefik) the webproxy network is likely to be missing
#and the following lines can be removed or commented out. Alternatively, the network can be created with "docker network create webproxy".
networks:
  default:
    name: webproxy
    external: true
For direct access via IP address or localhost - even without reverse proxy, DNS or public IP - the commented out port setting can be enabled for testing purposes byremoving "#" in front of "ports:" and "-"83:80"" .If the reverse proxy is not used, the network webproxy is not needed and the networks: .. section can be removed. For the Internet access via the Traefik reverse proxy, the domain must be replaced in the labels with the previously created DNS entries (in the example: ha.domain.tld) .To make it easier to transfer or back up the relevant container data, the example uses bind mounts and not Docker Volumes for permanent data storage. See: Docker data storage: Docker Volumes vs. Host Folders and Practice: Backup Docker Container Data: Volumes / Bind Mounts.
Bash access
For a direct access to the bash command line of the container, the following command can be used:
docker exec -it home-assistant /bin/bashSee also: /docker
The call can be used for example to assemble and test "command_line" sensors.
ZigBee with ZHA
To use a ZigBee USB dongle, such as the ConBee II, when using ZHA it is sufficient to mount the stick via "devices".
services:
  hass:
    image: homeassistant/home-assistant:stable
    container_name: home-assistant
    #Labels for ReverseProxy, see: https://www.libe.net/en-traefik
    labels:
      - "traefik.enable=true"
      - "traefik.http.routers.ha.rule=Host(`ha.domain.tld`)"
      - "traefik.http.routers.ha.entrypoints=web"
      - "traefik.http.routers.ha.entrypoints=websecure"
      - "traefik.http.routers.ha.tls.certresolver=myresolver"
      - "traefik.http.services.ha.loadbalancer.server.port=8123"
    restart: always
    volumes:
      - ./haconfig:/config
      - /etc/timezone:/etc/timezone:ro
      - /etc/localtime:/etc/localtime:ro
    expose:
       - "8123"
    devices:
      - /dev/ttyACM0
   #For direct test access, remove "#" in the following 2 lines. Call: http://localhost:8123 or http://ServerIP:8123
    #ports:
      #- "8123:8123"
#Without using a reverse proxy (https://www.libe.net/en-traefik) the webproxy network is likely to be missing
#and the following lines can be removed or commented out. Alternatively, the network can be created with "docker network create webproxy".
networks:
  default:
    name: webproxy
    external: true
Alternative: deCONZ and Home-Assistant in a docker-compose.yml-file
To allow the Conbee 2 stick to be accessed via deCONZ, I modified the docker-compose file as follows:
services:
  hass:
    image: homeassistant/home-assistant:stable
    container_name: home-assistant
    #Labels for ReverseProxy, see: https://www.libe.net/en-traefik
    labels:
      - "traefik.enable=true"
      - "traefik.http.routers.ha.rule=Host(`ha.domain.tld`)"
      - "traefik.http.routers.ha.entrypoints=web"
      - "traefik.http.routers.ha.entrypoints=websecure"
      - "traefik.http.routers.ha.tls.certresolver=myresolver"
      - "traefik.http.services.ha.loadbalancer.server.port=8123"
    restart: always
    volumes:
      - ./haconfig:/config
      - /etc/timezone:/etc/timezone:ro
      - /etc/localtime:/etc/localtime:ro
    expose:
       - "8123"
   #For direct test access, remove "#" in the following 2 lines. Call: http://localhost:8123 or http://ServerIP:8123
    #ports:
    #  - "8123:8123"
  deconz:
    image: marthoc/deconz
    container_name: deconz
    environment:
      DECONZ_DEVICE: '/dev/ttyACM0'
      DECONZ_VNC_MODE: '1'
      DECONZ_VNC_PORT: '5900'
      DECONZ_VNC_PASSWORD: 'password'
    restart: always
    volumes:
      - ./deconz:/root/.local/share/dresden-elektronik/deCONZ
      - /etc/timezone:/etc/timezone:ro
      - /etc/localtime:/etc/localtime:ro
    devices:
      - /dev/ttyACM0
    ports:
       - 83:80
       - 5983:5900

#Without using a reverse proxy (https://www.libe.net/en-traefik) the webproxy network is likely to be missing
#and the following lines can be removed or commented out. Alternatively, the network can be created with "docker network create webproxy".
networks:
  default:
    name: webproxy
    external: true
After about a year with deCONZ I switched to Zigbee2MQTT, another year later to ZHA. Zigbee2MQTT offers a solid alternative to ZHA:
Alternative: Zigbee2MQTT, MQTT and Home-Assistant in one docker-compose.yml - file.
My complete setup, consisting of Home Assistant, MQTT and Zigbee2MQTT, a running Let's Encrypt reverse proxy running, looked like this in the meantime:
services:
  hass:
    image: homeassistant/home-assistant:stable
    container_name: home-assistant
    #Labels for ReverseProxy, see: https://www.libe.net/en-traefik
    labels:
      - "traefik.enable=true"
      - "traefik.http.routers.ha.rule=Host(`ha.domain.tld`)"
      - "traefik.http.routers.ha.entrypoints=web"
      - "traefik.http.routers.ha.entrypoints=websecure"
      - "traefik.http.routers.ha.tls.certresolver=myresolver"
      - "traefik.http.services.ha.loadbalancer.server.port=8123"
    restart: always
    volumes:
      - ./haconfig:/config
      - /etc/timezone:/etc/timezone:ro
      - /etc/localtime:/etc/localtime:ro
    expose:
       - "8123"
   #For direct test access, remove "#" in the following 2 lines. Call: http://localhost:8123 or http://ServerIP:8123
    #ports:
    #  - "8123:8123"
  mosquitto:
    image: eclipse-mosquitto
    container_name: mqtt
    restart: always
    volumes:
      - ./mosquitto/config:/mosquitto/config
      - ./mosquitto/data:/mosquitto/data
      - ./mosquitto/log:/mosquitto/log
    ports:
      - "1883:1883"
      - "9001:9001"
  zigbee2mqtt:
      container_name: zigbee2mqtt
      restart: always
      image: koenkk/zigbee2mqtt
      volumes:
        - ./zigbee2mqtt-data:/app/data
        - /run/udev:/run/udev:ro
      ports:
        - 83:8080
      environment:
        - TZ=Europe/Vienna
      devices:
        - /dev/ttyACM0
#Without using a reverse proxy (https://www.libe.net/en-traefik) the webproxy network is likely to be missing
#and the following lines can be removed or commented out. Alternatively, the network can be created with "docker network create webproxy".
networks:
  default:
    name: webproxy
    external: true
other Docker services: InfluxDB and Grafana
In order to store long-term values for my heating and to be able to visualize them better, I also use InfluxDB to store the data and Grafana to analyze it. The connection of the InfluxDB here is done via the Home-Assistant config file configuration.yml
...
influxdb:
  include:
    entities:
       - sensor.1...
       - sensor.2...
  host: influxdb
  port: 8086
  database: ha
  username: ha
  password: ???
  max_retries: 3
Version 1 uses a username and password for the connection, version 2: token, organization and bucket.
Since I don't want to evaluate all data in Grafana, I used "include" to store only certain sensors. The complete Docker setup for Home-Assistant, InfluxDB and Grafana currently looks like this for me:
services:
  hass:
    image: homeassistant/home-assistant:stable
    container_name: home-assistant
    #Labels for ReverseProxy, see: https://www.libe.net/en-traefik
    labels:
      - "traefik.enable=true"
      - "traefik.http.routers.ha.rule=Host(`ha.domain.tld`)"
      - "traefik.http.routers.ha.entrypoints=web"
      - "traefik.http.routers.ha.entrypoints=websecure"
      - "traefik.http.routers.ha.tls.certresolver=myresolver"
      - "traefik.http.services.ha.loadbalancer.server.port=8123"
    restart: always
    volumes:
      - ./ha:/config
      - /etc/timezone:/etc/timezone:ro
      - /etc/localtime:/etc/localtime:ro
     devices:
        - /dev/ttyACM0
    expose:
       - "8123"
   #For direct test access, remove "#" in the following 2 lines. Call: http://localhost:8123 or http://ServerIP:8123
    #ports:
    #  - "8123:8123"
  influxdb:
      container_name: influxdb
      restart: always
      image: influxdb
      volumes:
        - ./influxdb:/var/lib/influxdb
        - ./influxdb2:/var/lib/influxdb2
      ports:
        - 8086:8086
  grafana:
      container_name: grafana
      restart: always
      image: grafana/grafana
      volumes:
        - ./grafana:/var/lib/grafana
      ports:
        - 3000:3000
#Without using a reverse proxy (https://www.libe.net/en-traefik) the webproxy network is likely to be missing
#and the following lines can be removed or commented out. Alternatively, the network can be created with "docker network create webproxy".
networks:
  default:
    name: webproxy
    external: true
see also: InfluxDB: Time series database - Docker and Grafana: Docker - visualize data and define alarms
Conclusion
Operating Home Assistant as a Docker container is initially more complex and means doing without the HA Add-on Store. However, one of the main advantages of this installation variant is its flexibility and uniformity. Using a reverse proxy container, for example, provides secure access from the internet to any web services on the home network within and outside the Docker environment.
 ({{pro_count}})
{{percentage}} % positive
 ({{con_count}})