Prusa i3 based printers: improvements and adjustments

Entry-level printers, such as the GEEETech i3 pro B, are a solid starting point, but have the potential for improvement in some areas. Certain modifications can improve security and print quality, as well as functionality:

Those who want to comfortably control or monitor the printer via the browser can do so very easily with the help of a Raspberry Pi. Depending on the model, a dedicated MOSFET should possibly be used for the hot plate. A must-have is certainly a separate fan for the hotend :
Print Overhangs -> Cooling Fan - PLA
An additional fan on the hotend increases the print quality significantly when using PLA.

Safety -> MOSFET
For many entry-level models, an additional MOSFET is recommended. The reason: An additional MOSFET for the heating bed relieves the controller board and reduces the load on the built-in MOSFET:

See: 3D Printer Caution Fire Hazard
Webinterface -> Raspberry
By adding a Raspberry Pi, a web interface for control and monitoring can be easily added. See: OctoPi Installation - Setup

Switch off power supply -> Relay
230V relays in front of the power supply allow switching on and off via web interface (OctoPrint), for this I installed additional relay.

Grooves in print -> Z Wobbling
If recurring grooves appear in the print, it can be due to an unbalance of the Z-axis. With the following part the axis of the Geeetech Prusa i3 Pro B can be decoupled and the print will be much cleaner: www.thingiverse.com/thing:1953569
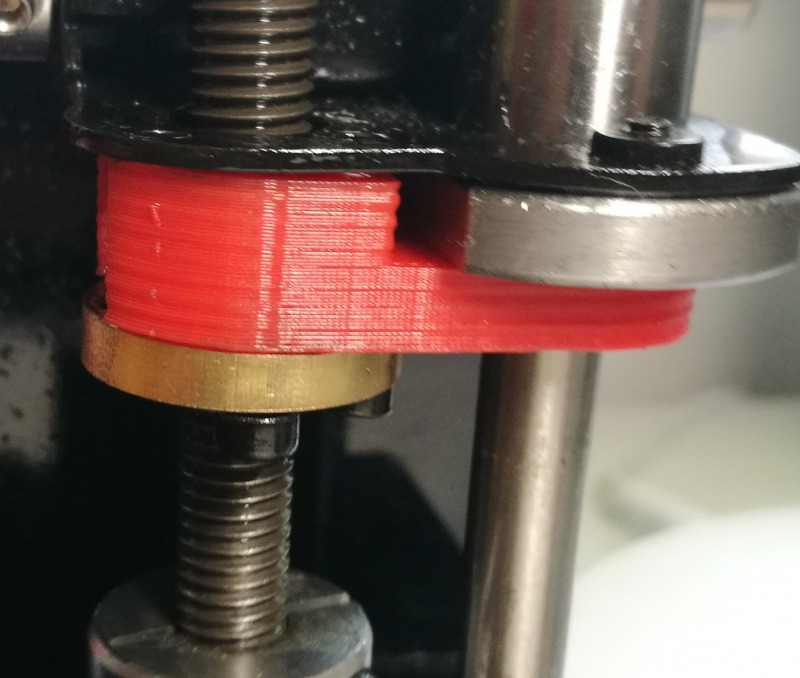
Accelerate Z-axis -> Spindle upgrade
The original Prusa i3 has a steeper spindle and thus creates a higher speed on the Z-axis, see: .
After upgrading the spindle, the Geeetech in PrusaSlicer no longer needs to adjust the speed for the Z-axis. Actually, I would have needed the correct motor shaft couplings for this as well. In the course of the upgrade, I wanted to increase the internal cross-section of the motor shaft couplings and destroyed them in the process. Putting them together provisionally, I was able to print out new ones : www.thingiverse.com/thing:1136606.

nozzle clogged - dropout -> drive modified
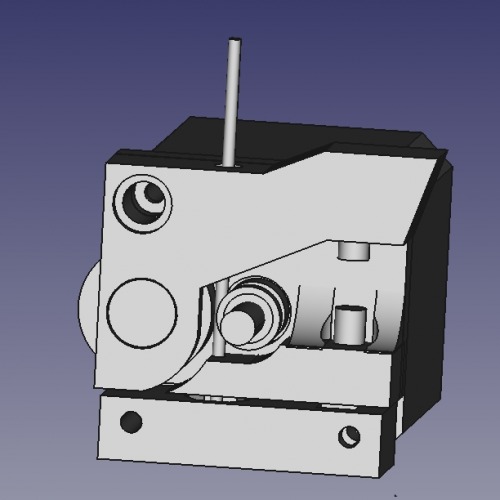
see: Top useful and less useful 3D models 3D: direct extruder drive printed by myself
Quiet printing -> stepper motor driver
TMC2208 stepper motor driver modules silence the printer: The volume can be minimized simply by swapping the stepper drivers. The stepper motors will then hum as quiet as a whisper:

Change filament -> roll holder
For the filament I simply have 2 rails with built-in ball bearings, so I only have to put the roll into the runners, changing the filament is thus as easy as possible:

Filament feed -> Guide
For the filament feed I use a PTFE- Teflon hose:

Filament out -> Sensor
To make better use of the filament at the end, a filament sensor is recommended: If the filament runs out while printing, the print head can park itself on its side, whereupon another filament can be attached and printing can continue.

Conclusion
In most cases, especially entry-level models can be upgraded with simple adjustments or extensions. To do this, the 3D printer can be used to produce certain parts for the printer itself, see: Top useful and less useful 3D models
 ({{pro_count}})
{{percentage}} % positive
 ({{con_count}})