Change Windows 10 BIOS (Legacy) to UEFI Boot

When installing Windows 10, depending on the BIOS setting, UEFI or BIOS is used as boot mode. Normally, the PC would have to be reinstalled when switching from BIOS to UEFI, but it also works differently ... For those who prefer a video, this article can also be viewed on Youtube watch.
Read out which boot mode is used?
UEFI vs. Legacy: Display with system information
Whether the UEFI or Legacy mode is used for booting the PC can be read out most easily via "System information":

If UEFI is not in use, the BIOS mode is Legacy.

See also: BIOS mode: UEFI or Legacy
MBR vs. GPT: Displays in Disk Management
For UEFI mode, the disk must use the GPT partition style, but a Windows installation in BIOS mode (Legacy) must use the MBR partition style.
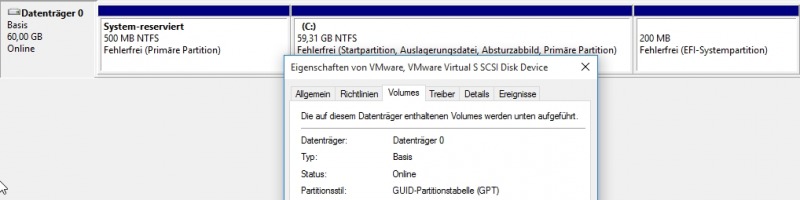
A right click on the disk and "Volumes" shows the partition type, here "MBR":

Procedure: Switching from legacy (BIOS) to UEFI mode
In order for the computer to use UEFI mode, the hard disk must first be converted from MBR to GPT and the boot configuration must then be adjusted. Before Microsoft provided the command line tool "mbr2gpt", the partition layout could be changed from MBR to GPT with the Linux tool Testdisk. Afterwards it was necessary to create an EFI partition via the Windows setup DVD and to create the bootfiles on it. This relatively complex procedure was simplified with the command "mbr2gpt".
Using "mbr2gpt" to change to UEFI is much easier, but not without risk, so before running the command I would first create a Backup the hard disk and as a precaution a Download Windows boot media to be able to repair the boot partition if necessary. If something goes wrong, the EFI parittion can be created as follows via commands in the Windows boot medium prompt (WINRE), see Setting up UEFI boot: Booting with the Windows DVD: Recovery.
Enough caution, in summary the following command in the Windows command prompt is sufficient to change a legacy installation to UEFI, for this the command prompt must be started as "administrator":

mbr2gpt /convert /disk:0 /allowFullOSAfterwards, the computer can be shut down and the boot mode in the firmware should be changed to "UEFI", see: UEFI / BIOS - Boot.
Here is a screenshot of my last attempt:

If you want to be on the safe side, you can use the "/validate" parameter to check in advance whether all prerequisites are met. The parameter "allowFullOS" tries the changes directly from the running operating system. Originally, the command could only be executed from the WinRE environment (Windows boot medium).See: Change partition from MBR to GPT, without data loss
Via the WinRE environment, "mbr2gpt" usually only half worked in my attempts and the PC could no longer boot. So that the PC started again , I had to create the bootfiles again, this is possible with the command bcdboot in the command prompt of the boot medium.
Variant without "mbr2gpt" with testdisk and WinRE (bootmedium)
MBR zu GPT konvertieren mit Testdisk
Alternatively to "mbr2gpt" the Linux tool Testdisk can be used, see MBR to GPT. When using Testdisk the EFI partition is missing completely, this can be created as follows:
Set up UEFI boot: Boot with Windows DVD: Recovery
If the boot partition is already formatted with GPT, the UEFI boot can be set up using the Windows boot media. The setup DVD or setup USB media can be downloaded as follows: Windows 10 / 11 - Download Installation - DVD or USB Boot. Booting from DVD or USB is again done via the boot menu: Boot the computer from USB or DVD - UEFI o. BIOS.
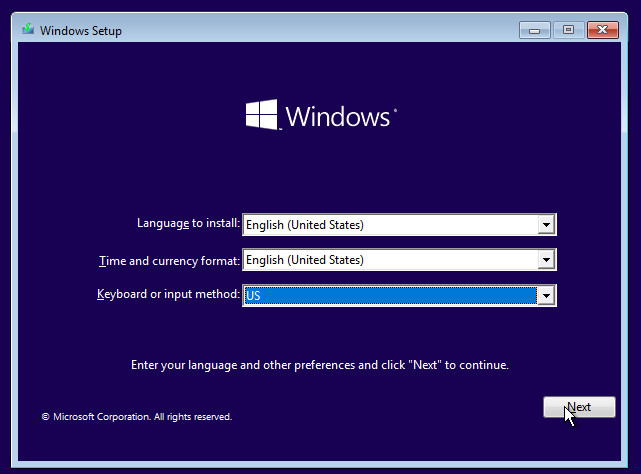
After the country setting, it goes on to the computer repair options:
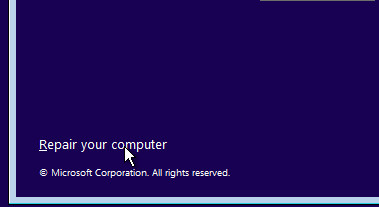
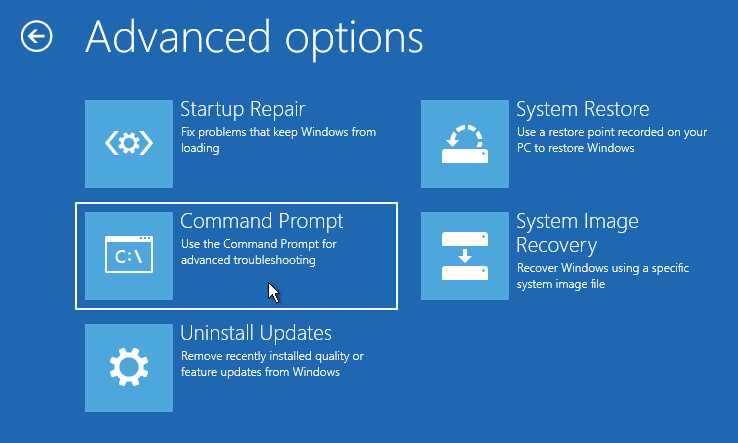
... Troubleshooting, Advanced Options, Command Prompt ...

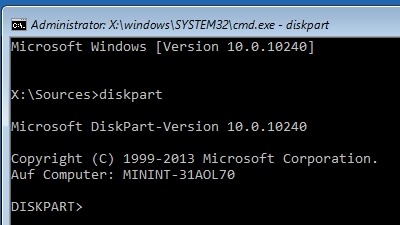
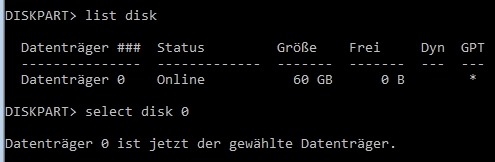
With the command diskpart and list disk the existing hard disks can be displayed:
select disk x selects a hard disk, here the boot hard disk with the number 0:
Displaying the partition is done with the command: list partition
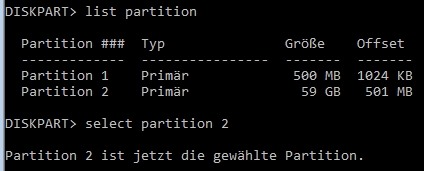
At this point the EFI partition is missing because there is no partition with the type "System".
The EFI partition does not necessarily have to be created at the beginning of the volume, when adding it later it is easier to put the EFI partition at the end of the volume. To make room at the end, partition 2 can be shrunk. The command: select partition 2 selects the partition and to shrink it: shrink minimum=200 desired=200

If there is free space, an EFI partition can be created: create partition efi

A new list partition shows the created EFI partition:
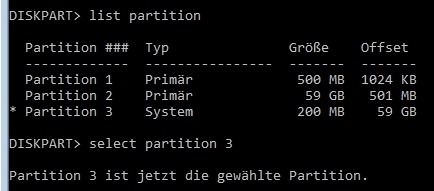
The EFI partition is, in the example, at the end of the data medium of the type "System" and has in the example the number 3. To write the boot code on the partition, this can be selected as follows: select partition 3
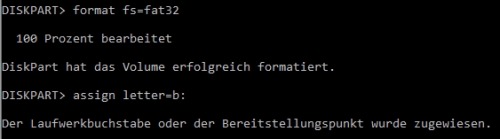
So that the bootfiles can be stored the partition must be formatted as fat32: format fs=fat32
and assign a drive letter: assign letter=b:
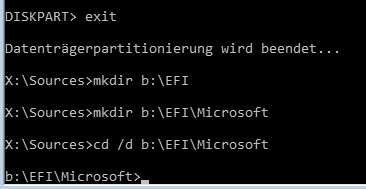
After the paritioning is prepared so far, I exit with exit diskpart and create the boot folders with the following commands:
mkdir b:\EFImkdir b:\EFI\Microsoftcd /d b:\EFI\Microsoft
Last but not least only the bootfiles are missing:
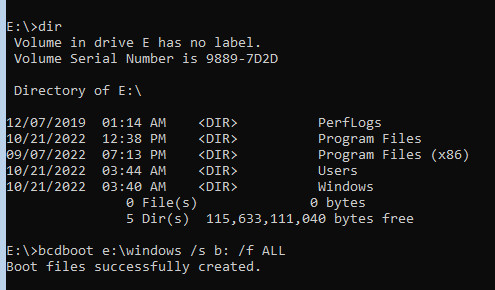
In my setup, the Windows installation is on drive e:, because after switching to drive d: (command e:) with the command you will see the known Windows folders, depending on the installation Windows could also be found on c: for example, the following command must be adjusted accordingly:
bcdboot e:\windows /s b: /f ALL
Information about the partition layout, see also: docs.microsoft.com/en-us/windows-hardware/manufacture/desktop/configure-uefigpt-based-hard-drive-partitions
Change legacy BIOS mode to UEFI,
To make the PC boot with the changed partition layout and from UEFI, "UEFI" must be set as boot mode in the BIOS, see: UEFI / BIOS - Boot.
After the successful boot, a look in the Disk Management shows the new partition layout:
YouTube-Video
 ({{pro_count}})
{{percentage}} % positive
 ({{con_count}})