Home Assistant integrations

The modular structure of Home Assistant enables communication with other devices or services and expands Home Assistant with additional functions.
What is an integration in Home Assistant?
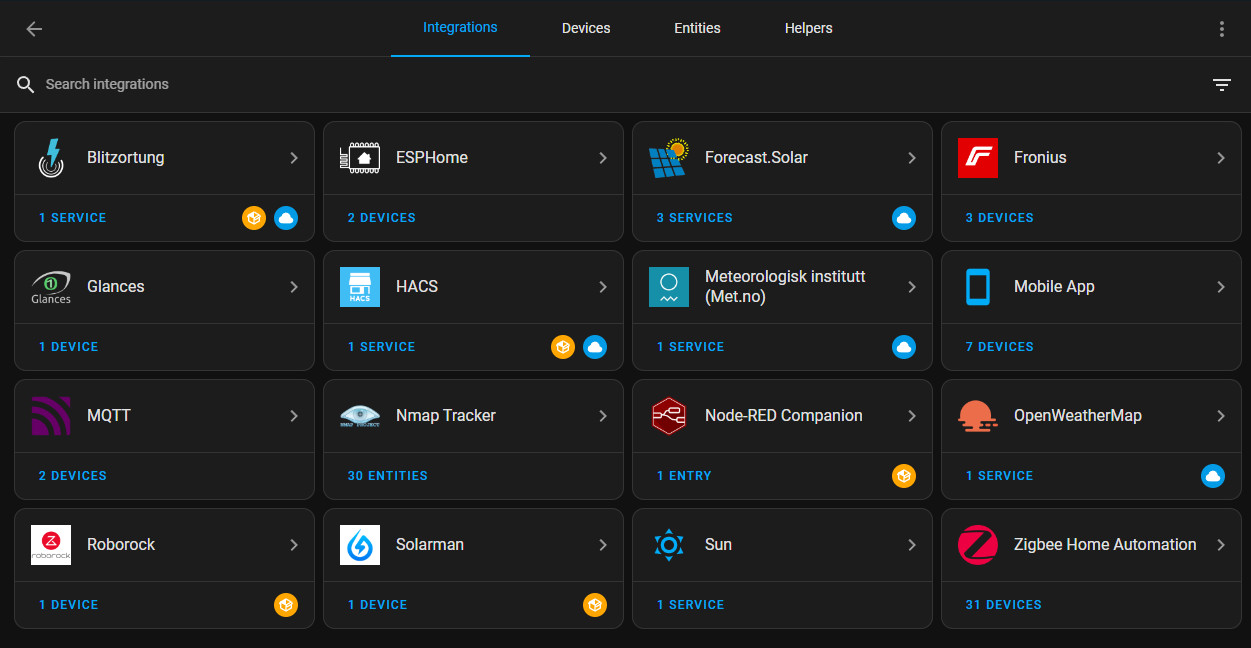
Home Assistant supports a large number of different manufacturers and integrates their devices or services via so-called integrations. The integrations ensure, among other things, that different devices can be made available uniformly in Home Assistant.
An example of an integration would be a Zigbee gateway: Home Assistant communicates with the gateway via the integration, whereby its devices - for example, connected lamps or sensors - can be made available uniformly in Home Assistant. Depending on the devices, communication does not necessarily have to take place via a gateway: Certain WLAN devices are usually addressed directly via an integration using the IP address (see: Shelly). In addition to providing devices, an integration can also be used to add certain services to Home Assistant, such as the Home Assistant Community Store, see HACS.
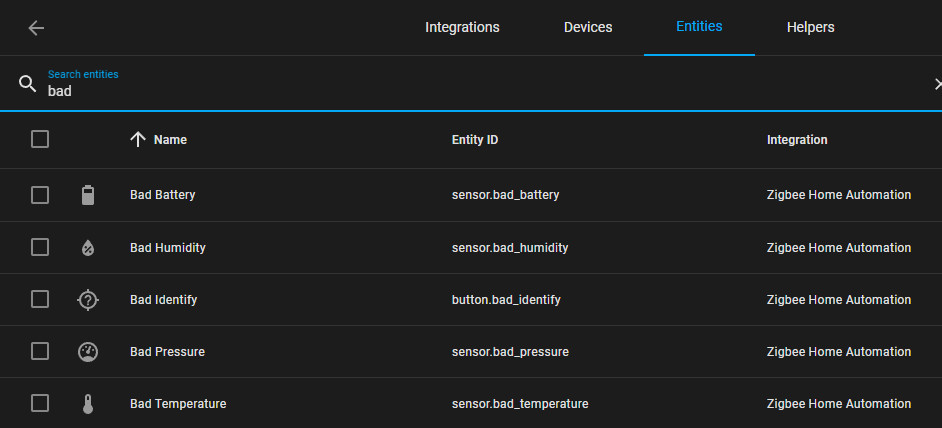
What are entities in Home Assistant?
Entities in Home Assistant reflect certain values, details, or properties of a device. For example, a temperature sensor may provide certain values as an entity:the temperature, humidity, air pressure, or battery status. Another example would be the properties of a lamp, this is likely to have as an entity a switch for turning it on and off and possibly another entity for adjusting the brightness or its light color.
ZigBee integration using the example of the Conbee2 - USB stick
To be able to use ZigBee devices with Home Assistant, I use the ConBee2 USB stick. Alternatively to the gateway solution of the manufacturer: Phoscon I recommend the use of ZigBee2MQTT or even better ZHA, see: HA: 3 different integrations for the ConBee 2 USB stick.

Home Assistant Community Store (HACS)
Even though Home Assistant supports many integrations, thanks to the use of the community, the range can be extended by countless additional integrations. HACS is an integration for downloading GitHub repositories via a kind of software catalog. The prerequisite for using the community integrations is the installation of the Home Assistant Community Store. The download of the Home Assistant Community Store starts in the terminal, which can be called up slightly differently depending on the Home Assistant installation.
Add HACS: Docker Core Installation
If you run Home Assistant in Docker, you can install HACS via the container's terminal:
user@rechner:~$ docker exec -it home-assistant bash
bash-5.0# wget -q -O - https://install.hacs.xyz | bash -
Add HACS: HAOS Installation
The easiest way to add HACS to a HAOS installation is via the following link: https://my.home-assistant.io/redirect/supervisor_addon/?addon=cb646a50_get&repository_url=https%3A%2F%2Fgithub.com%2Fhacs%2Faddons
If the store has been activated, additional user-defined components: integrations or front-end packages can be added.


The store is activated via: Settings, Integration

Integrations installed via a HACS repository are marked as "Custom Integration":

System Monitor
The "System Monitor" integration can be used for rudimentary monitoring of the operating system on which Home Assistant is running:

Monitor server or Linux systems
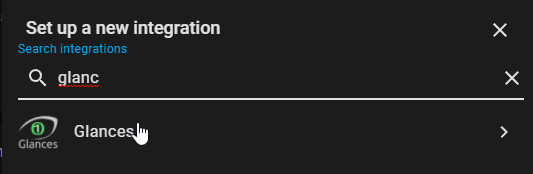
If you want to monitor the status of other Linux systems, you can use the integration "Glances". Glances collect data about CPU, memory or the free space of a hard disk and much more. As a prerequisite, Glances must first be installed on the systems to be monitored, see also: Glances - Monitor Linux Server

Shelly
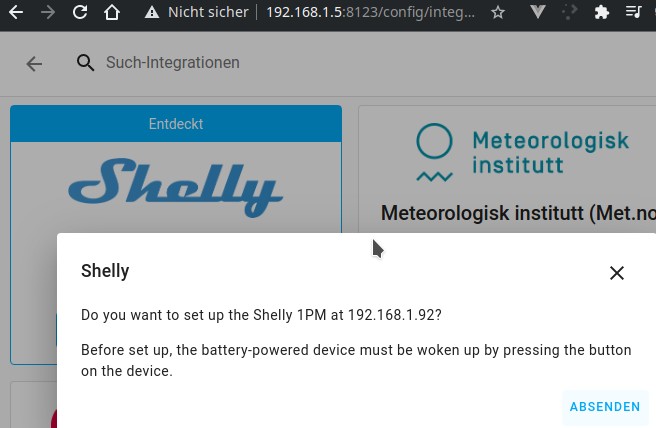
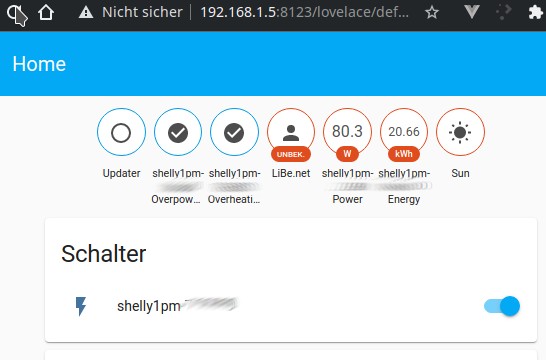
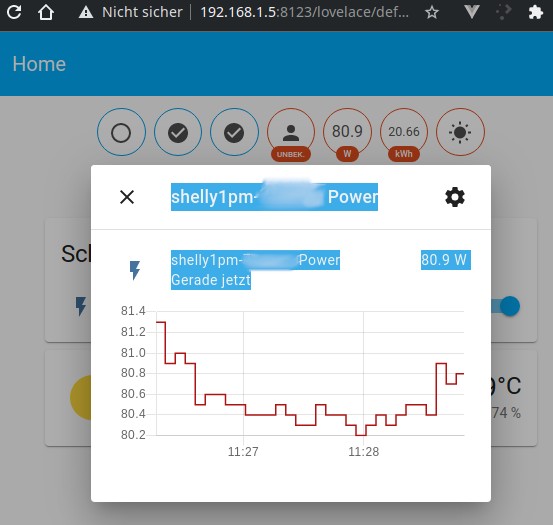
An example of an integration that communicates directly with a WLAN device is the WLAN switch Shelly:
Since Home Assistant makes it easy to connect different systems, I use a WLAN switch in addition to ZigBee. Shelly is a small flush-mounted WLAN switch for controlling e.g. a power socket.
After setup, the device is automatically assigned to the default home dashboard:
Device Tracker OpenWrt
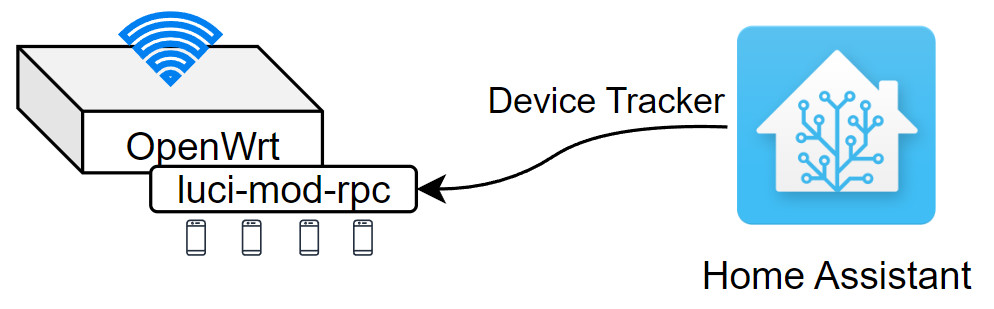
If you use the free OpenWrt router software, you can connect it to Home Assistant and use it to track your presence status.
device_tracker:
- platform: luci
host: 192.168.1.2
username: root
password: ???
interval_seconds: 30
consider_home: 360
new_device_defaults:
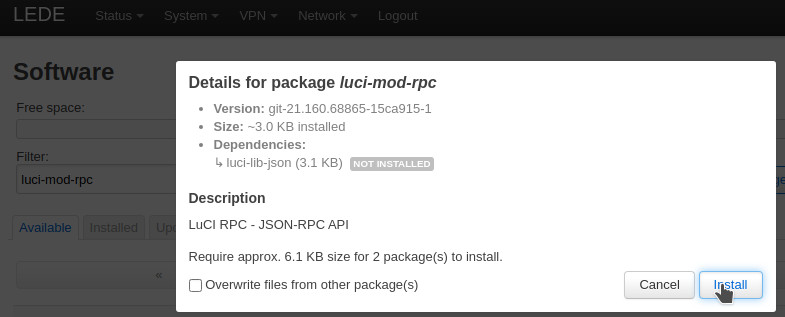
track_new_devices: trueFor OpenWRT the package luci-mod-rpc is required.
For information on OpenWrt, see: Alternative Router Firmware: OpenWrt and no longer DD-WRT
Alternatively, the status can also be queried via a ping:
Ping to a network device
If you use OpenWrt to detect the presence of devices on the network via a can do this via the Ping (ICMP) integration:

The status of the sensor is "disconnected" or "connected" depending on the accessibility of the device
InfluxDB
To evaluate certain sensor data outside of Home Assistant, Grafana, for example, can be used for visualization. To make the data available in Grafana, certain sensor data can be transferred to an external InfluxDB. The InfluxDB runs in parallel with the Home Assistant database. I have added the following block to the configuration.yaml file, to connect Home Assistant to the v1 Influx database:
influxdb:
  include:
    entities:
       - sensor.flowmeter
       - sensor.heating_vorlauf
       - sensor.heating_ruecklauf
       - sensor.aussen_temperature
       - sensor.heating_warmwasser
       - sensor.heating_pufferspeicher
       - sensor.heating_waermetauscher
       - sensor.heating
       - sensor.heating_active_power
       - sensor.heizstab_power
  host: influxdb
  port: 8086
  database: ha
  username: ha
  password: ???
  max_retries: 3
Connect MQTT devices as sensor
After adding the MQTT integration, a new sensor can be created in the configuration.yaml file:

MQTT requires an MQTT broker server, see MQTT - Broker : Docker Setup.
Adding individual sensors in the configuration.yaml file:
sensor:
  - platform: mqtt
    state_topic: "flowmeter/flow"
    name: "flowmeter"
    unit_of_measurement: "m³/h"
Services that use the MQTT broker:
- Zigbee2MQTT, see : Commissioning Zigbee2MQTT in Docker - step by step
- "AI-on-the-edge-device" digitizer, see : Monitor water meter, record consumption: ESP32-Cam
- smart meter, see : Read out smart meter of the network operator KAIFA MA309M

Home Assistant + ZigBee: 3 integrations for the ConBee 2
ZigBee integration with the ConBee 2 USB stick: 3 possible integration variants: ... continue reading

Deye PV balcony power plant commissioning and HA integration
The hype about PV systems has also left its mark on me, so - in order to gain some experience - I have put together an 800 watt balcony power plant: Cost in total about 600$. Balcony power plants are often offered as a set, which usually consists of an inverter and two PV modules including cables. The power of the inverter limits the maximum generation power of the plant. In Austria, balcony power plants with a generation capacity of up to a maximum of 800 watts are currently allowed, Germany s... ... continue reading

Monitor systems: Monitoring in HomeAssistant with Glances
For collecting system data from other operating systems, HomeAssistant offers Glances integration, among other things. Glances is a terminal program for monitoring system status such as CPU, memory or disk usage. The additional WebServer mode allows to retrieve the status without SSH. For information about the integration in Home-Assistant, see: Home-Assistant. ... continue reading

OpenWRT & Home Assistant: evaluate, visualize, automate
Access in your own network usually takes place centrally via the router, so certain conclusions can be drawn about its data. In addition to the utilization of the Internet access or the individual interfaces, the data from the OpenWRT router can also provide information about the status of certain devices. For example, the presence status of certain devices in the WiFi can be recorded via the device tracker. Using collectd and mqtt it is also possible to read out the CPU and RAM usage as well as... ... continue reading

HA: Use values of any WebGUI as entities
After my Internet access lost connection from time to time, I wanted to monitor the signal quality of the cable router in Home Assistant. Due to lack of API, I use the router's management interface for the query and parse the output in Bash. With this approach, the values from almost any web GUI can be made available in Home Assistant. ... continue reading

Node-RED in Docker and Home Assistant integration
Especially complex automations may become a bit confusing in Home Assistant and its automations. If you reach the limits of the integrated automations, you can alternatively use your own automation platform such as Node-Red. In Node-Red, processes can be put together using various logic modules in a visual GUI via drag and drop. ... continue reading
 ({{pro_count}})
{{percentage}} % positive
 ({{con_count}})